Earlier in 2026, the AI giant Anthropic announced Opus 4.6(1), the latest update to its frontier model series. Today, I want to share my experience using Claude Code to build a bank customer churn prediction model to see just how far this new version can go. Let’s dive in.
1. The Ultimate Coding Model
Opus 4.6 is Anthropic’s new masterpiece, outperforming Opus 4.5 across various benchmarks. Its coding capabilities, in particular, are often rated as the best in the industry, and it feels like it’s now a giant leap ahead of the competition.
2. Developing a Churn Prediction Model via "Agentic Coding"
I decided to pair Claude Code with Opus 4.6 to develop a prediction model using "agentic coding"—a method where the AI agent handles the entire Python implementation without human intervention.
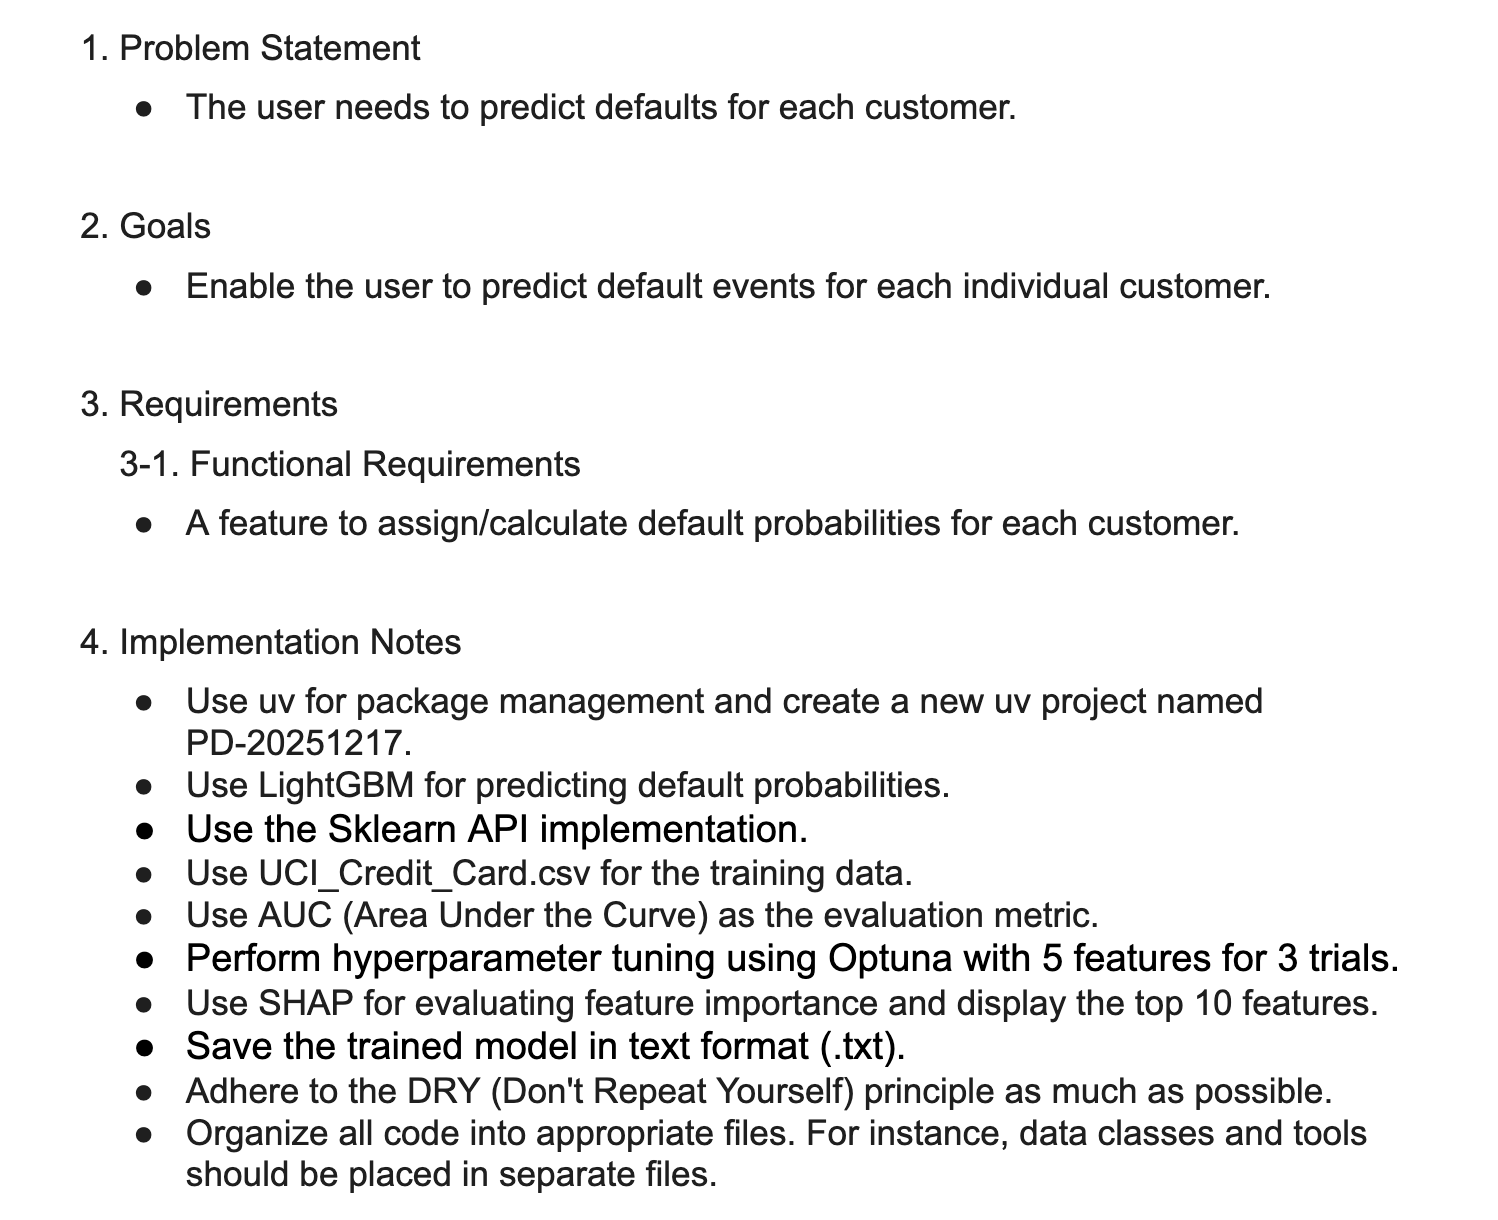
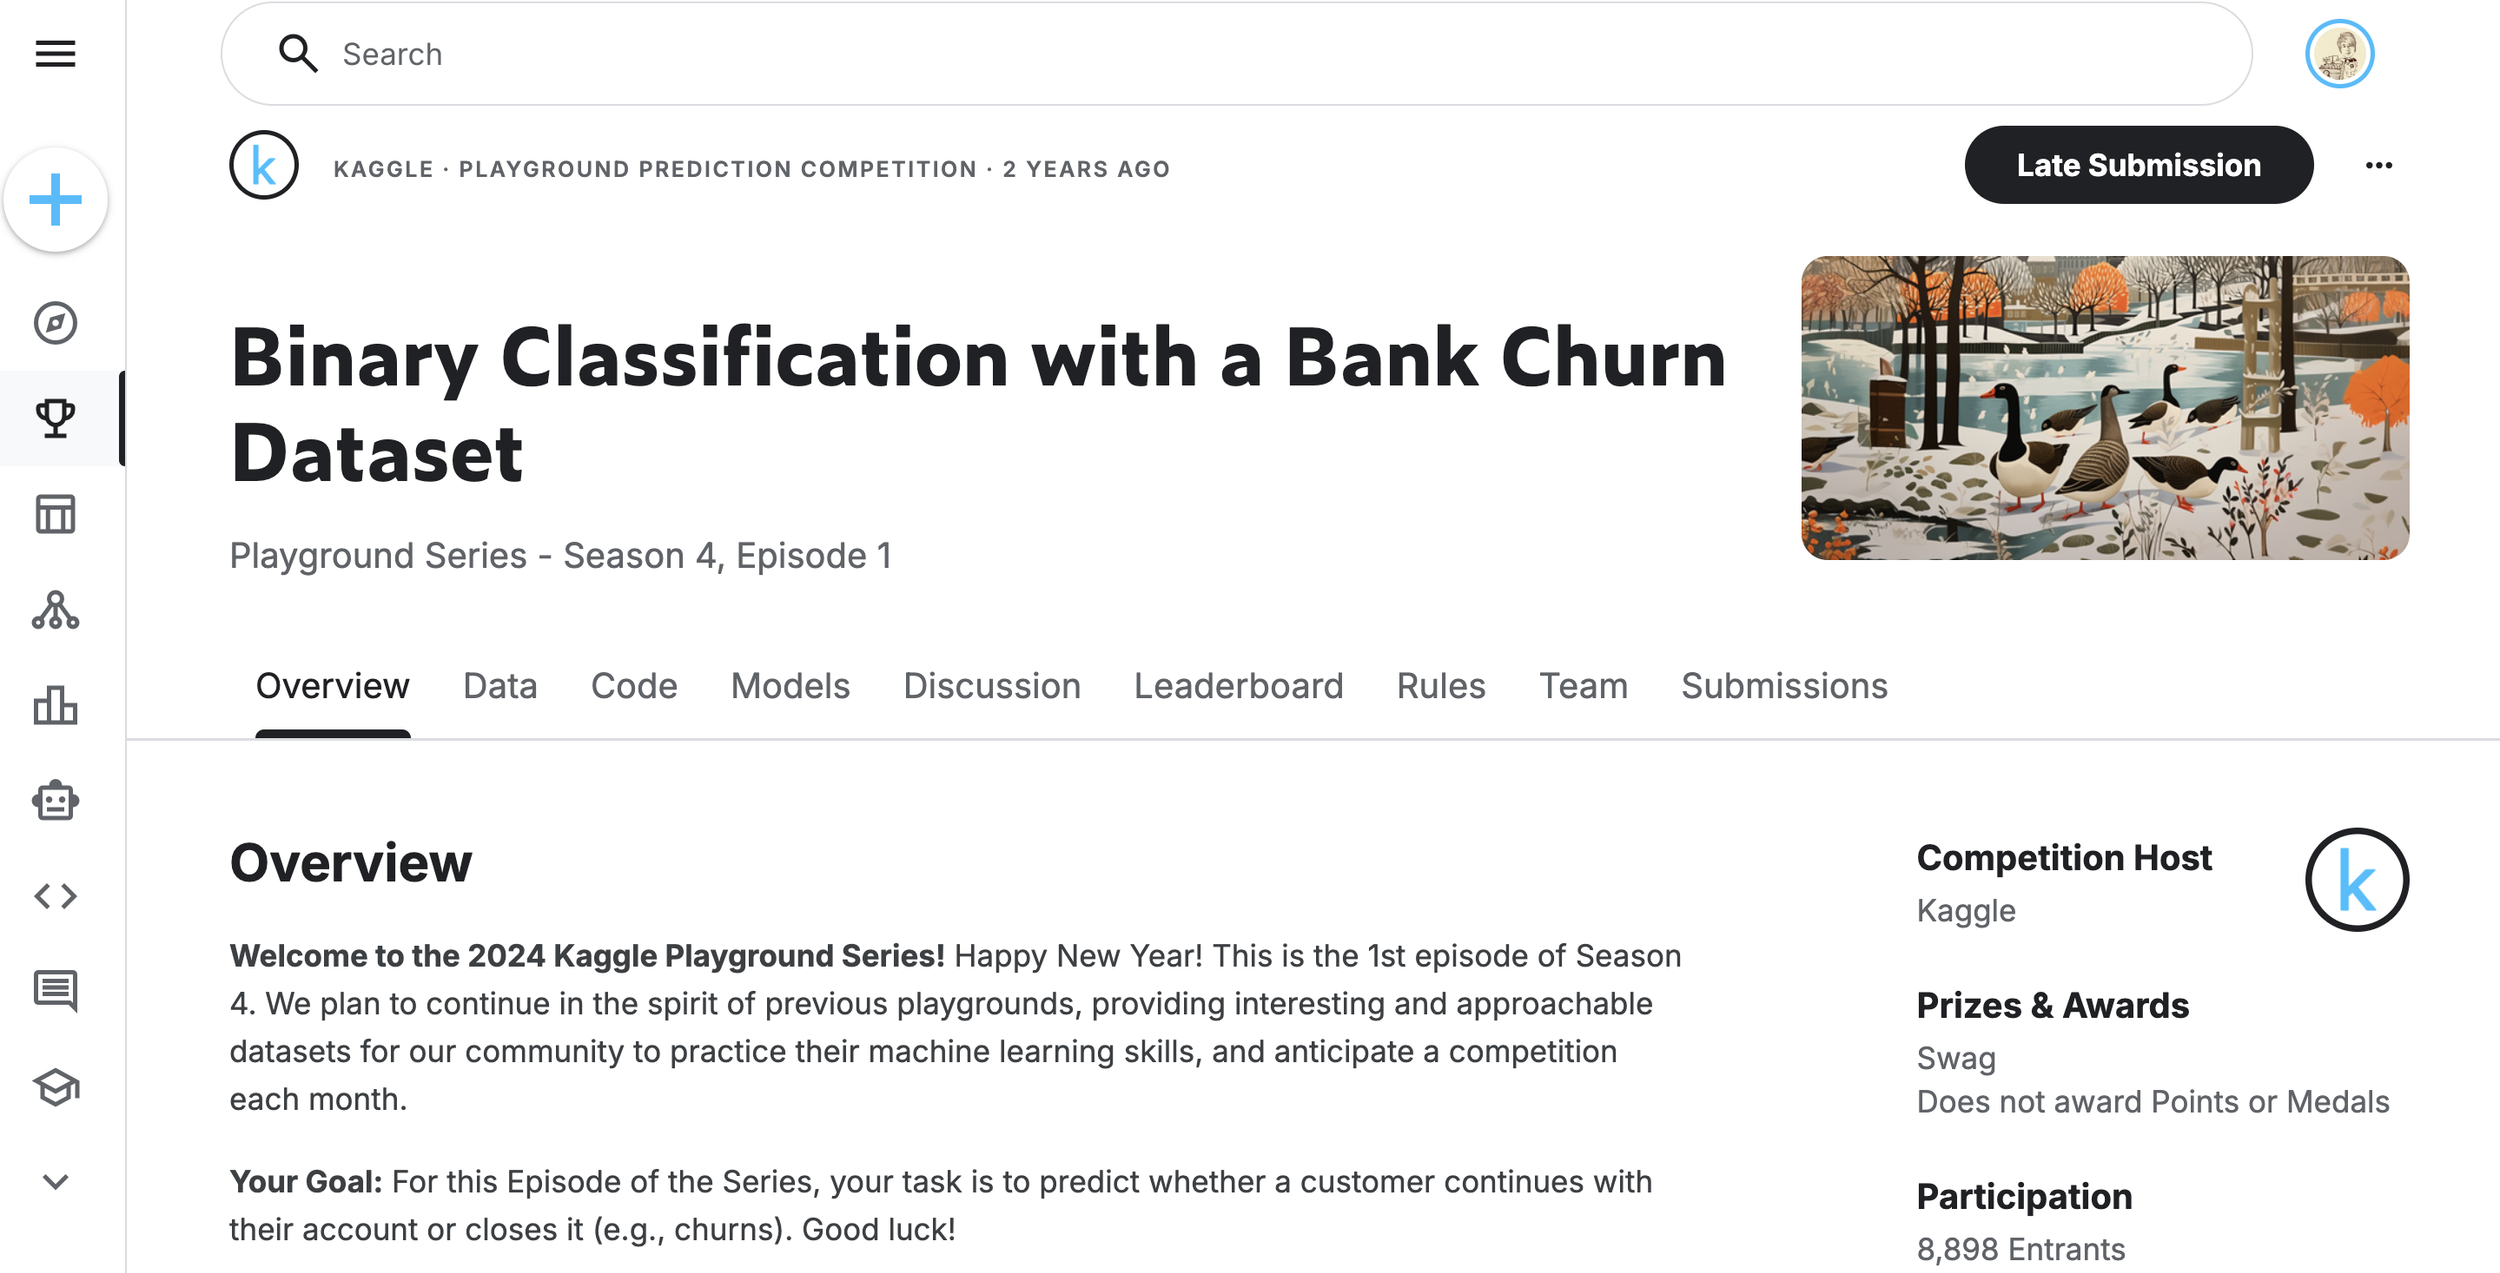
The task: Bank Customer Churn Prediction. Losing customers is costly and hurts brand loyalty. A predictive model allows us to identify "at-risk" customers and take proactive retention measures before they leave. For this experiment, I used a dataset from a well-known Kaggle competition.
The Workflow
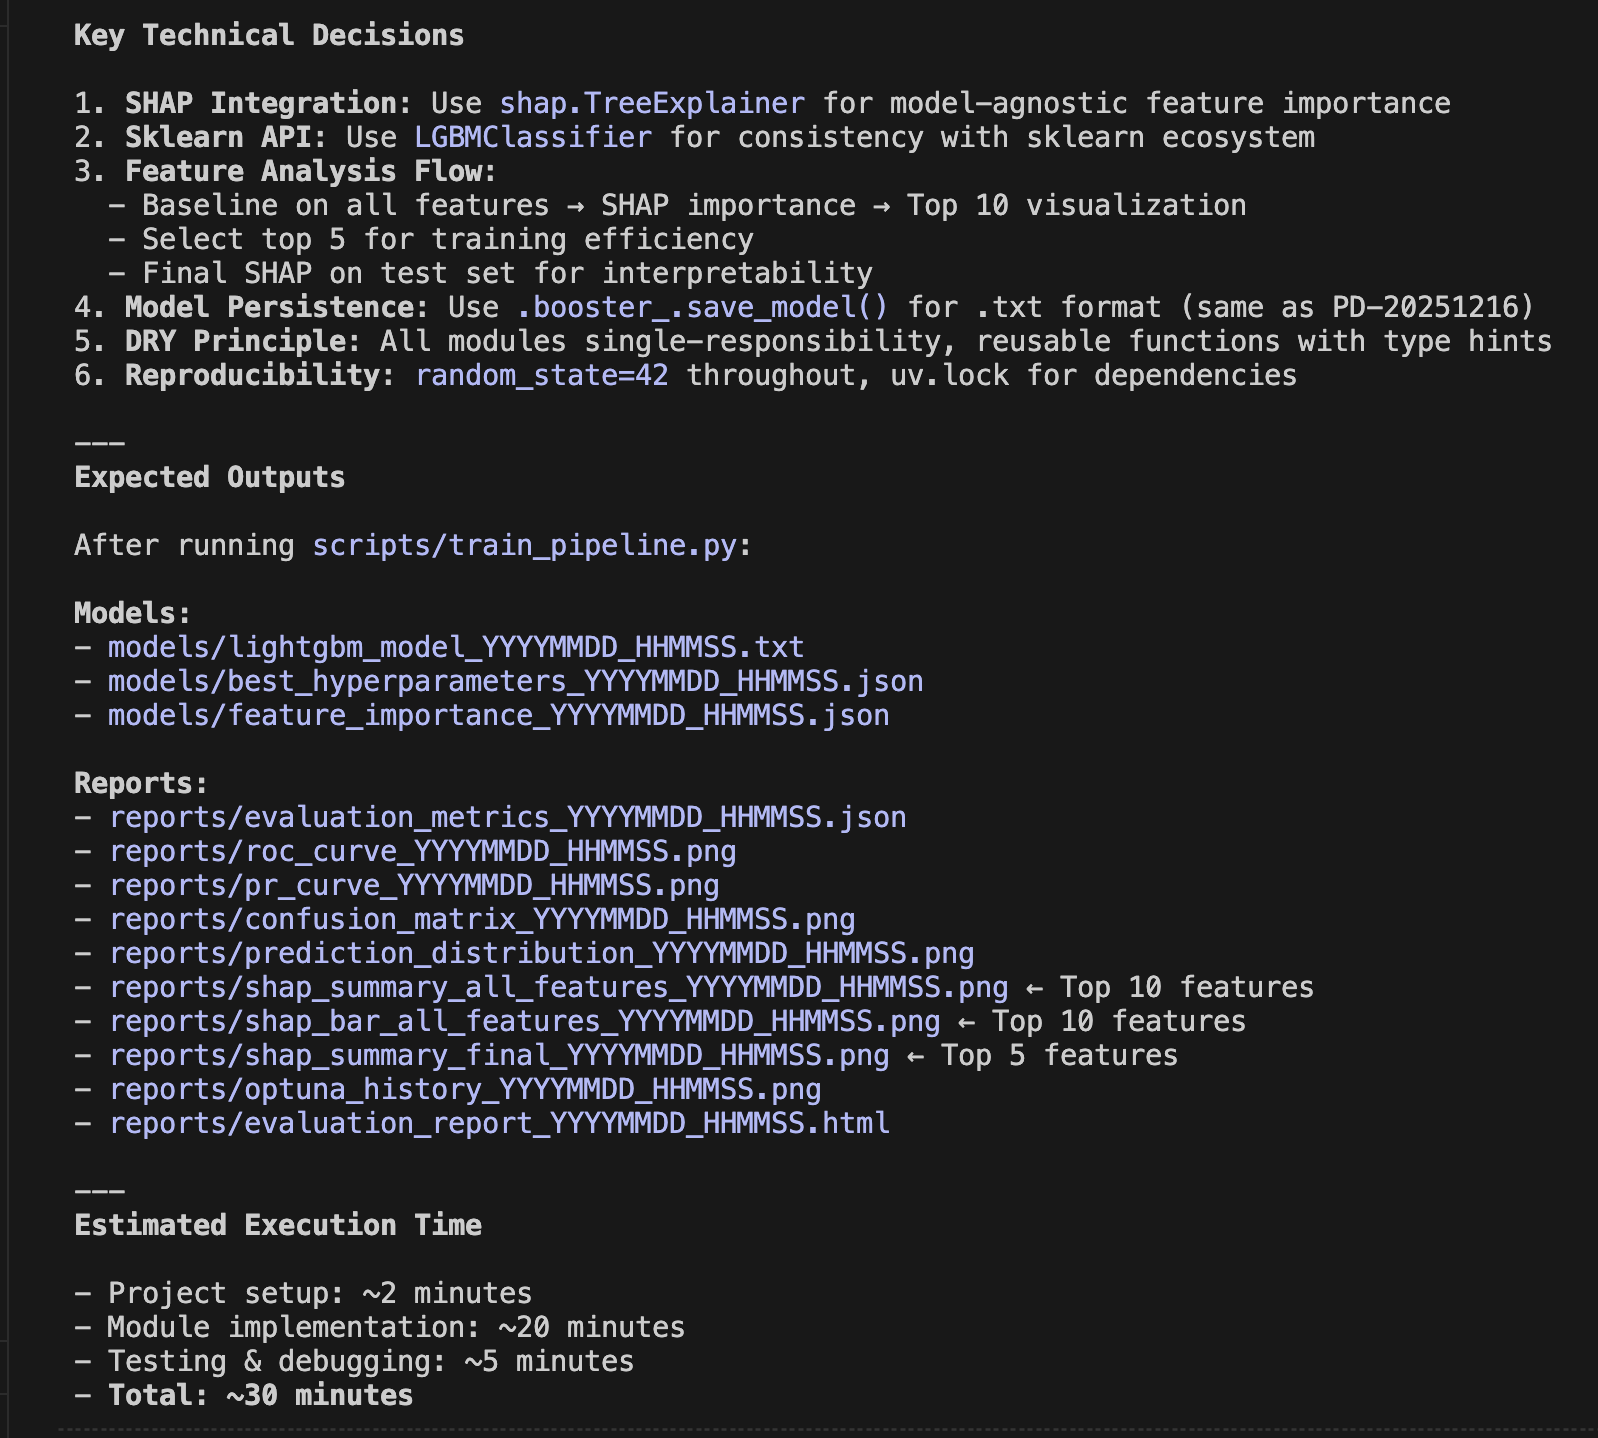
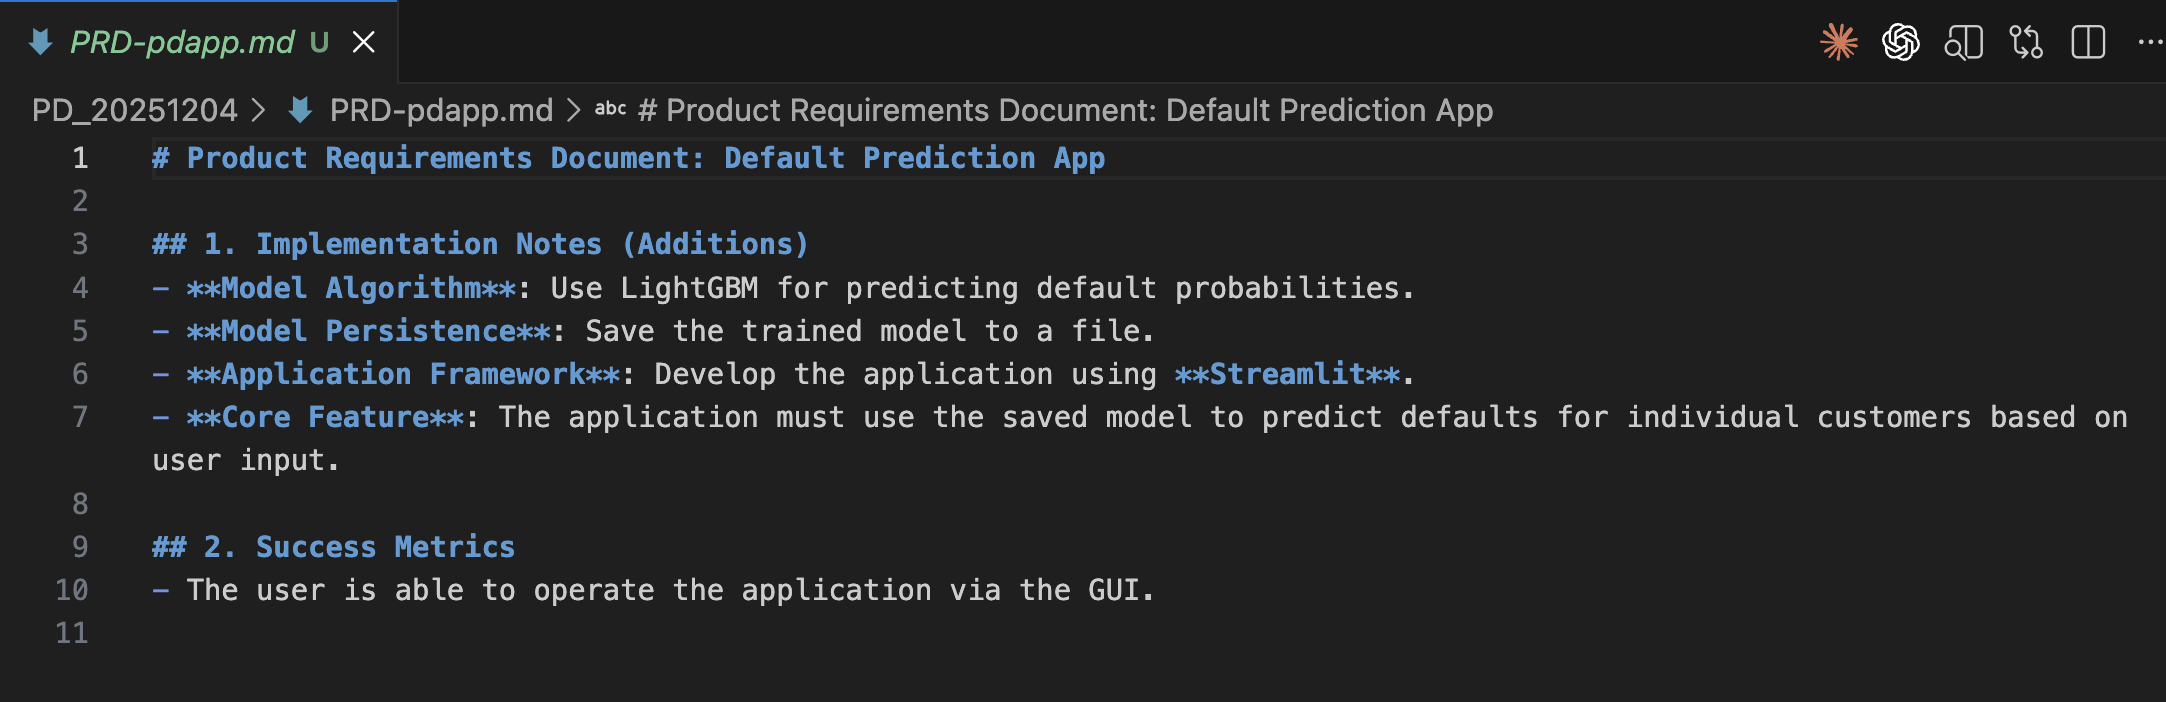
PRD Creation: I wrote a detailed Product Requirement Document (PRD) outlining my goals.
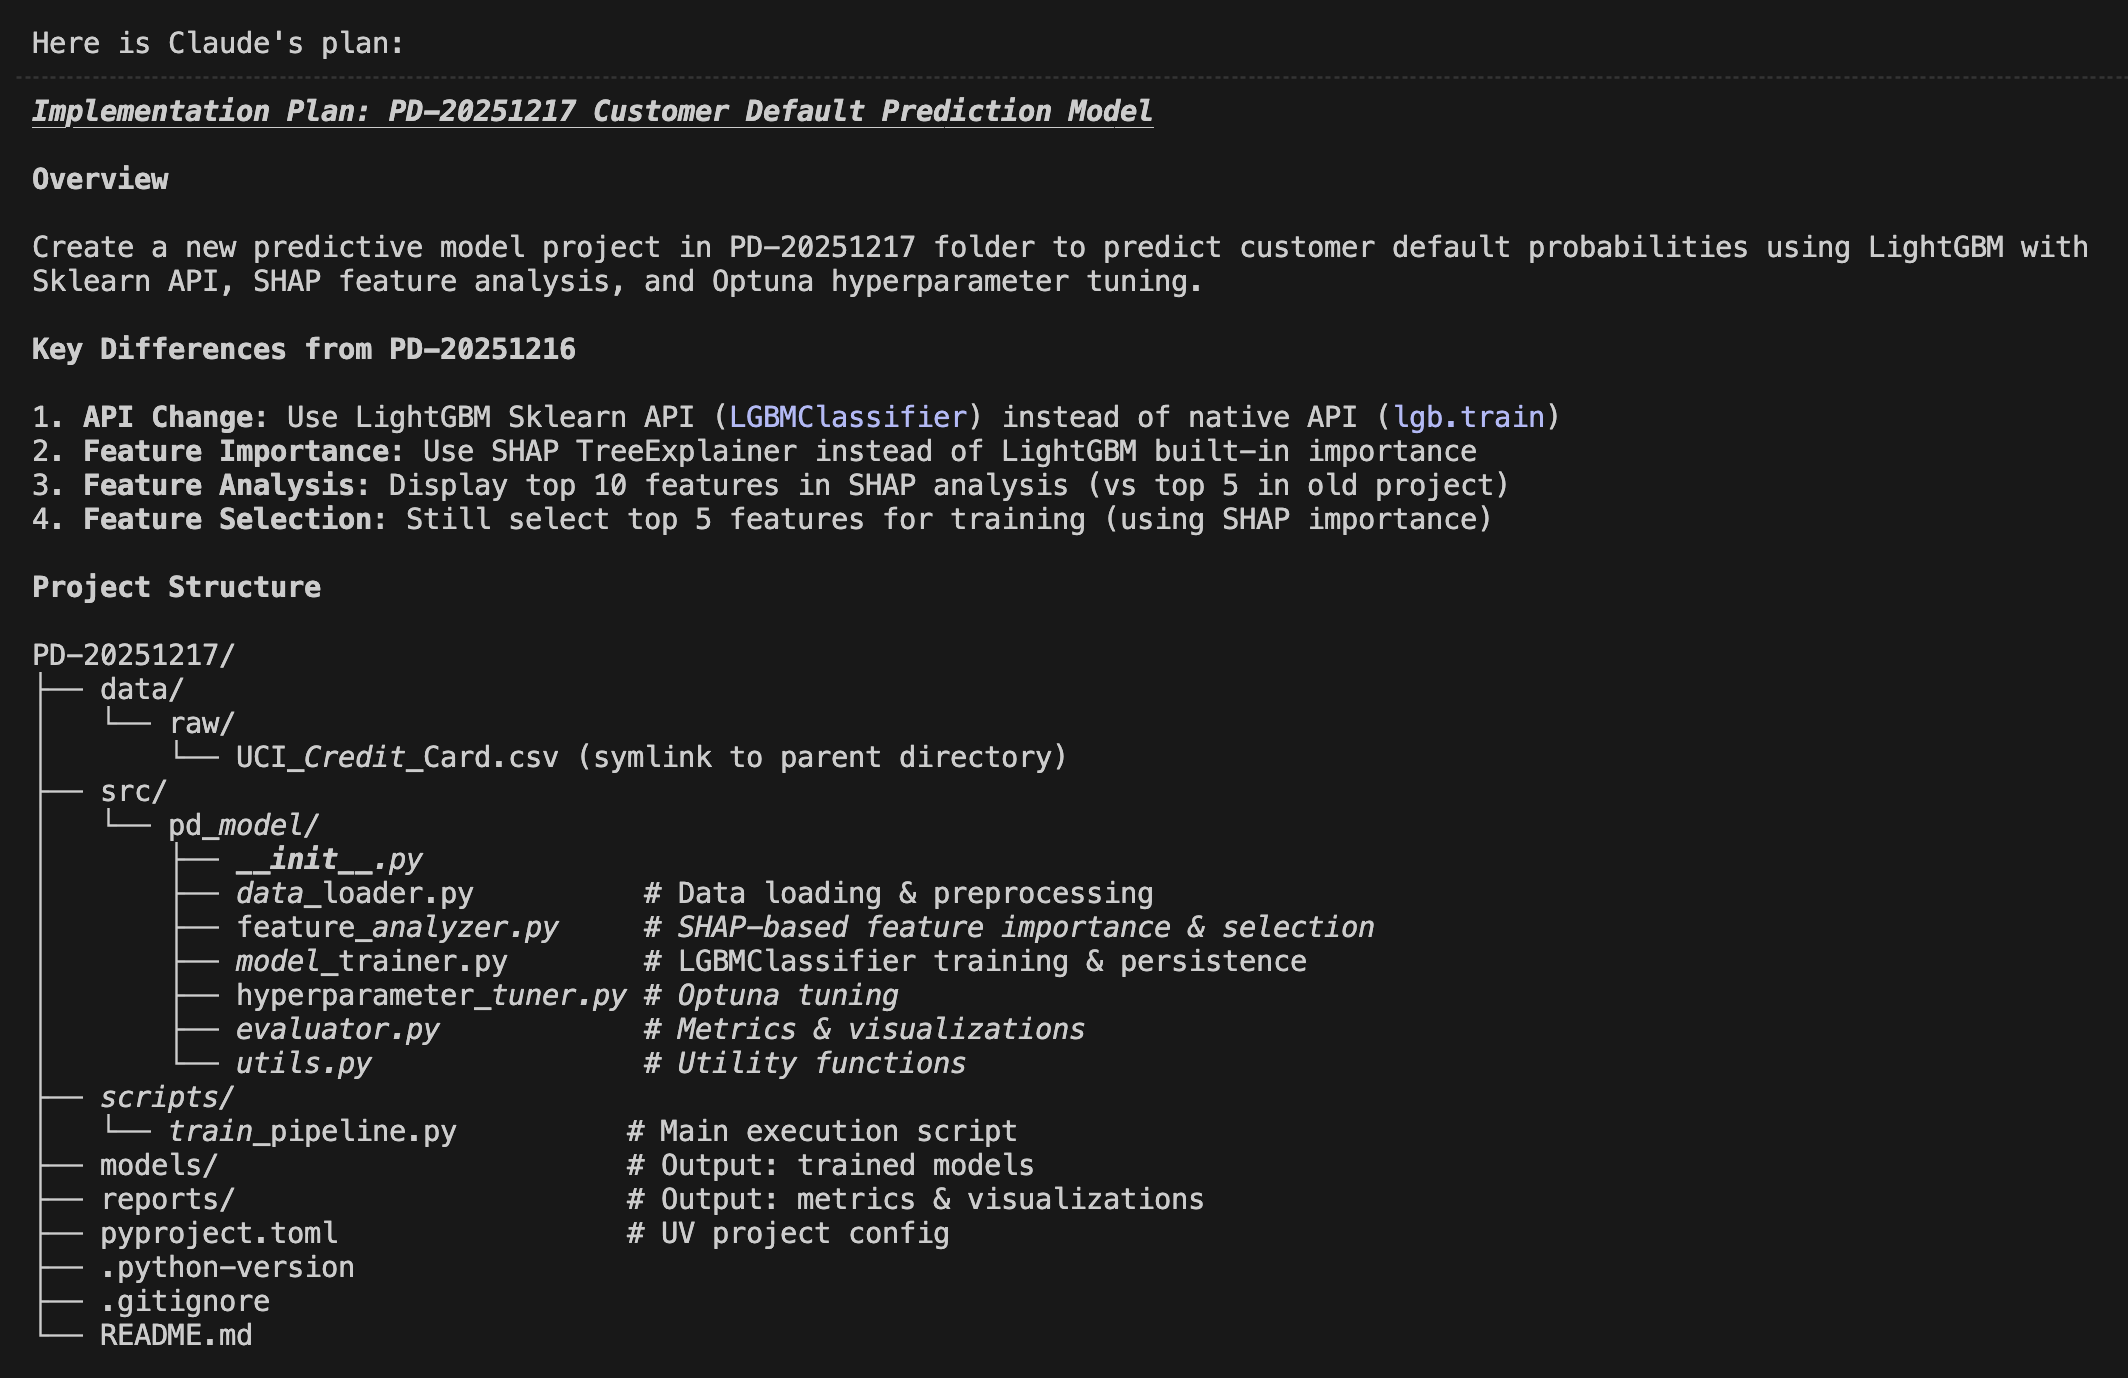
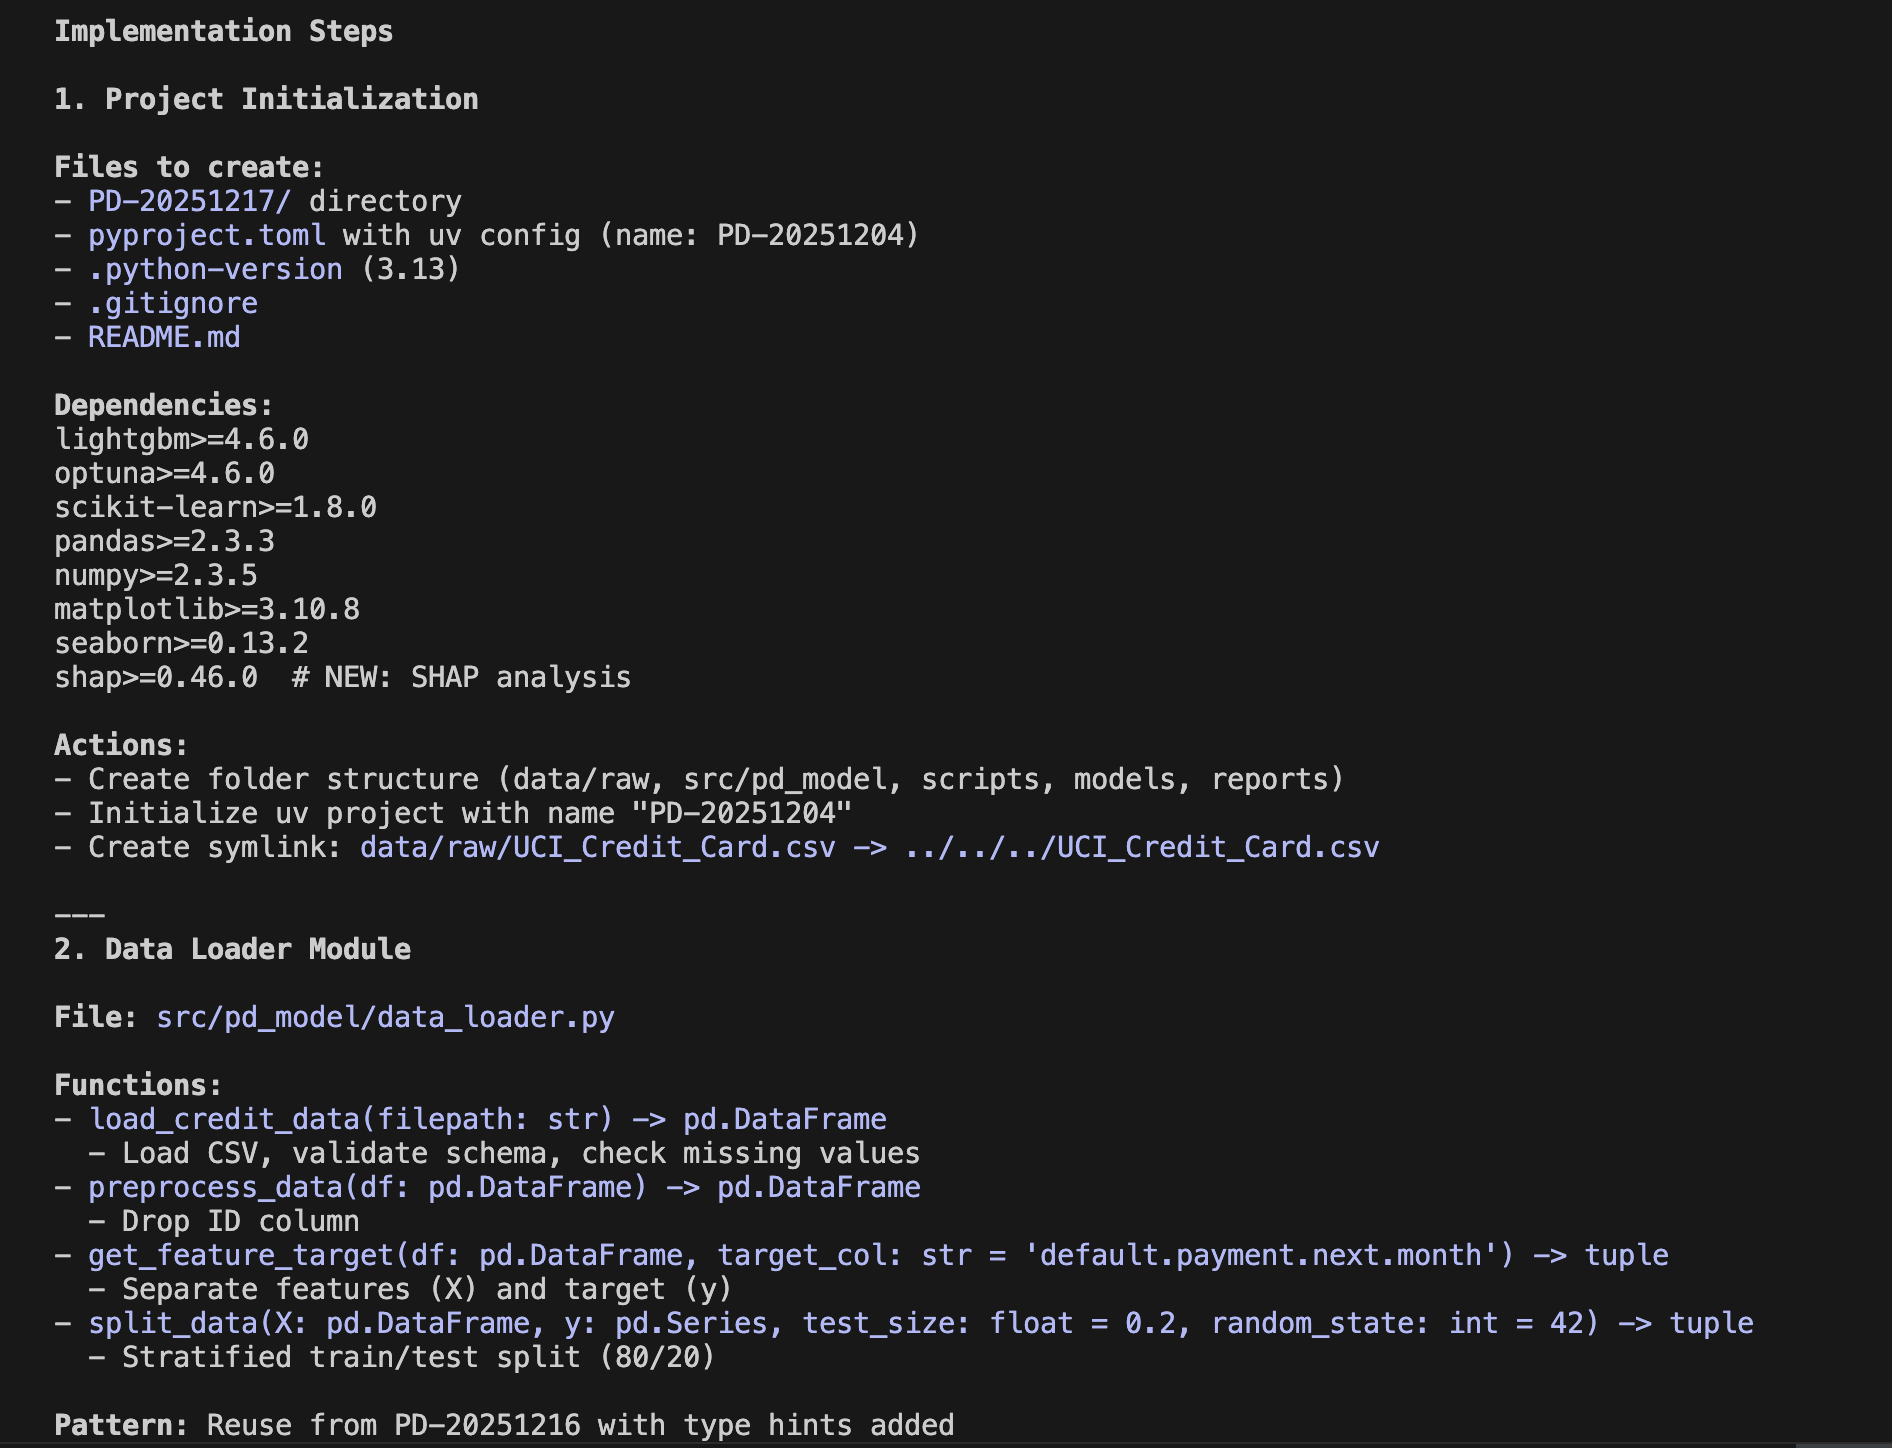
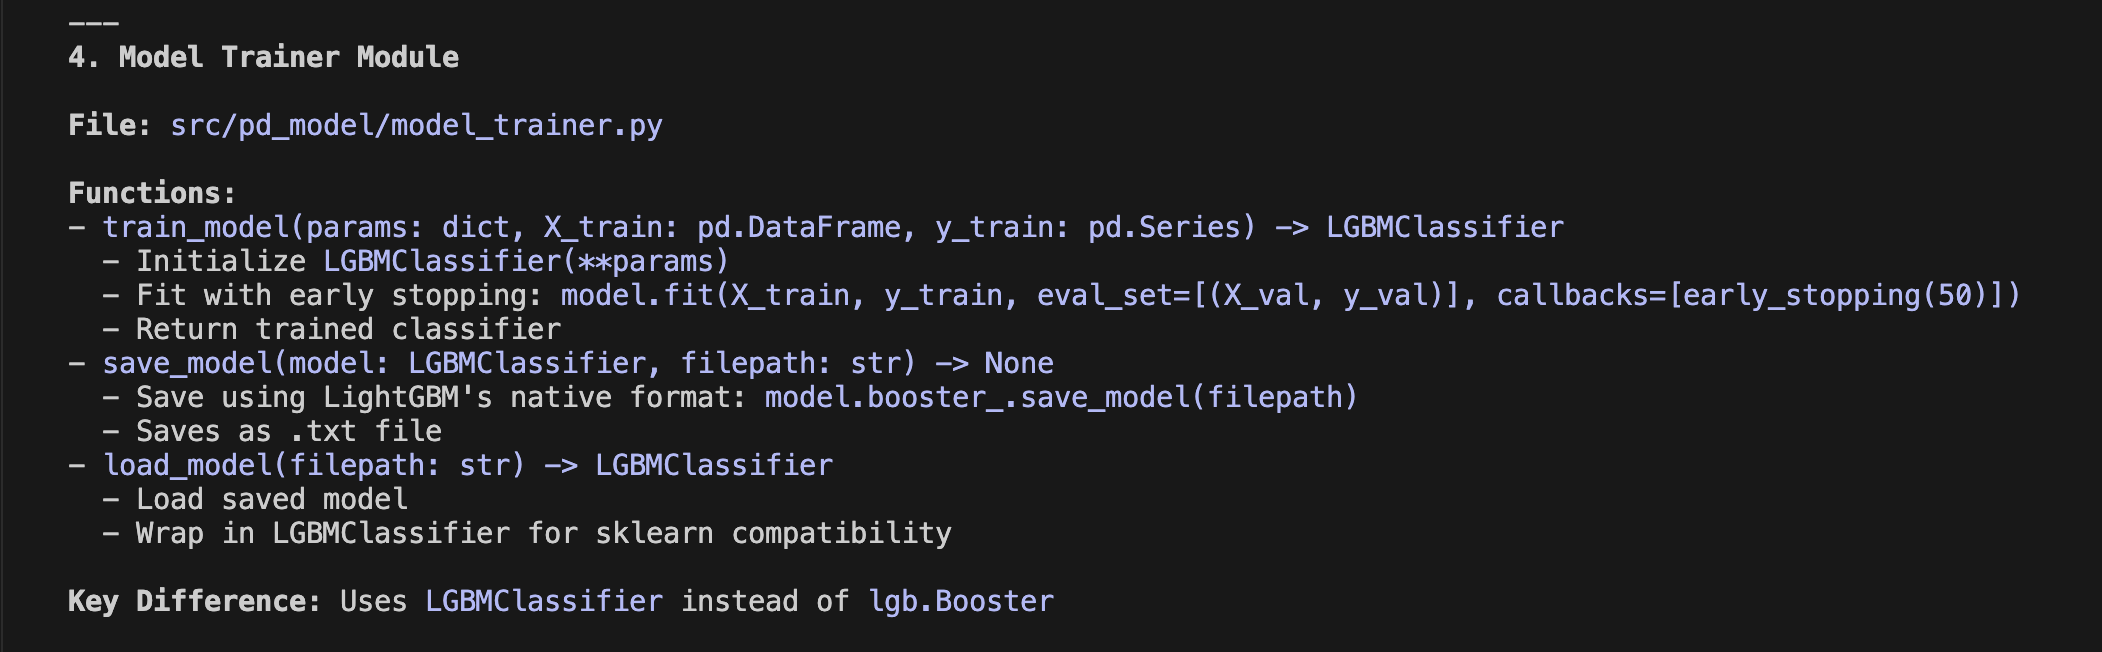
Autonomous Execution: I ran Claude Code in
plan mode. It drafted the implementation strategy, and once I gave the green light, it proceeded to code the entire system.Minimal Intervention: While Claude Code occasionally asked for permissions, I simply hit "yes" every time. It was effectively 100% AI-driven development.
The Resulting GUI
The final application is a sleek tool where you can select a Customer ID to see their specific churn probability. It clearly distinguishes between "Loyal" and "At-Risk" customers.
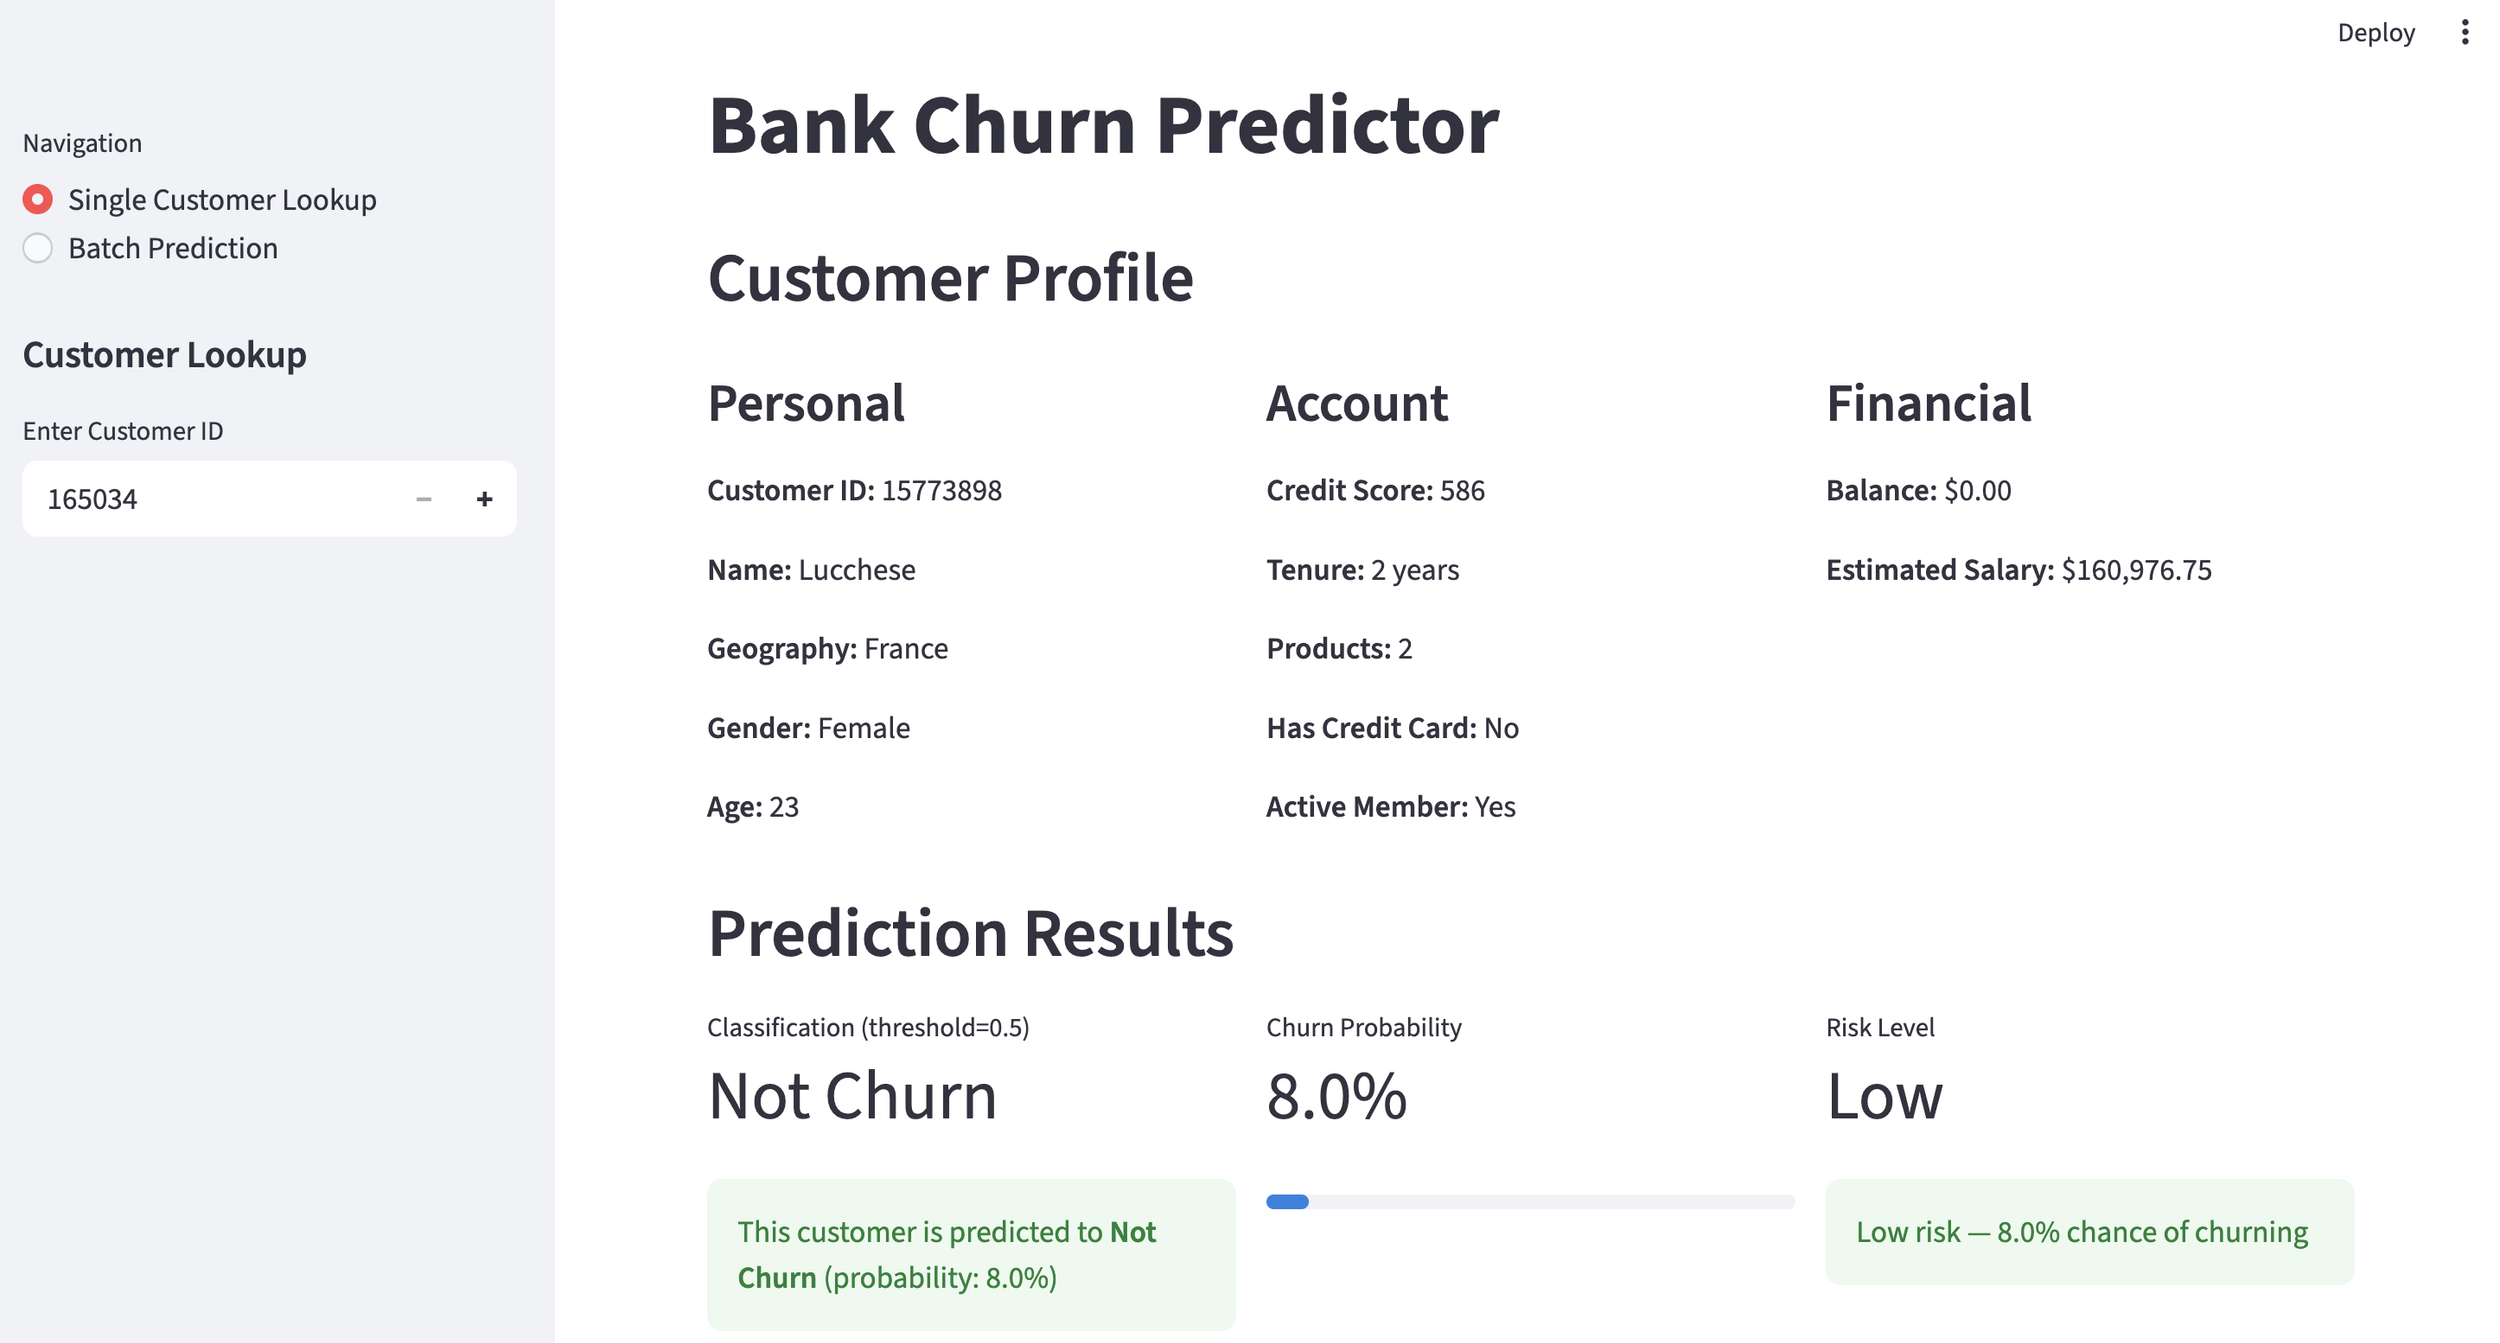
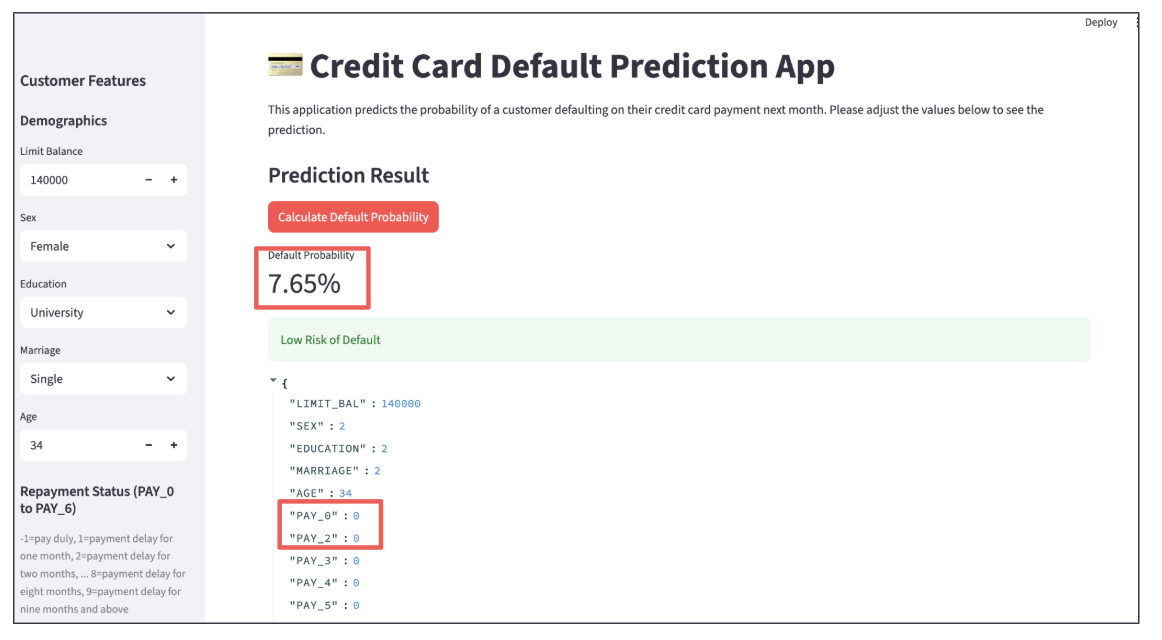
Example: Predicted Non-Churner
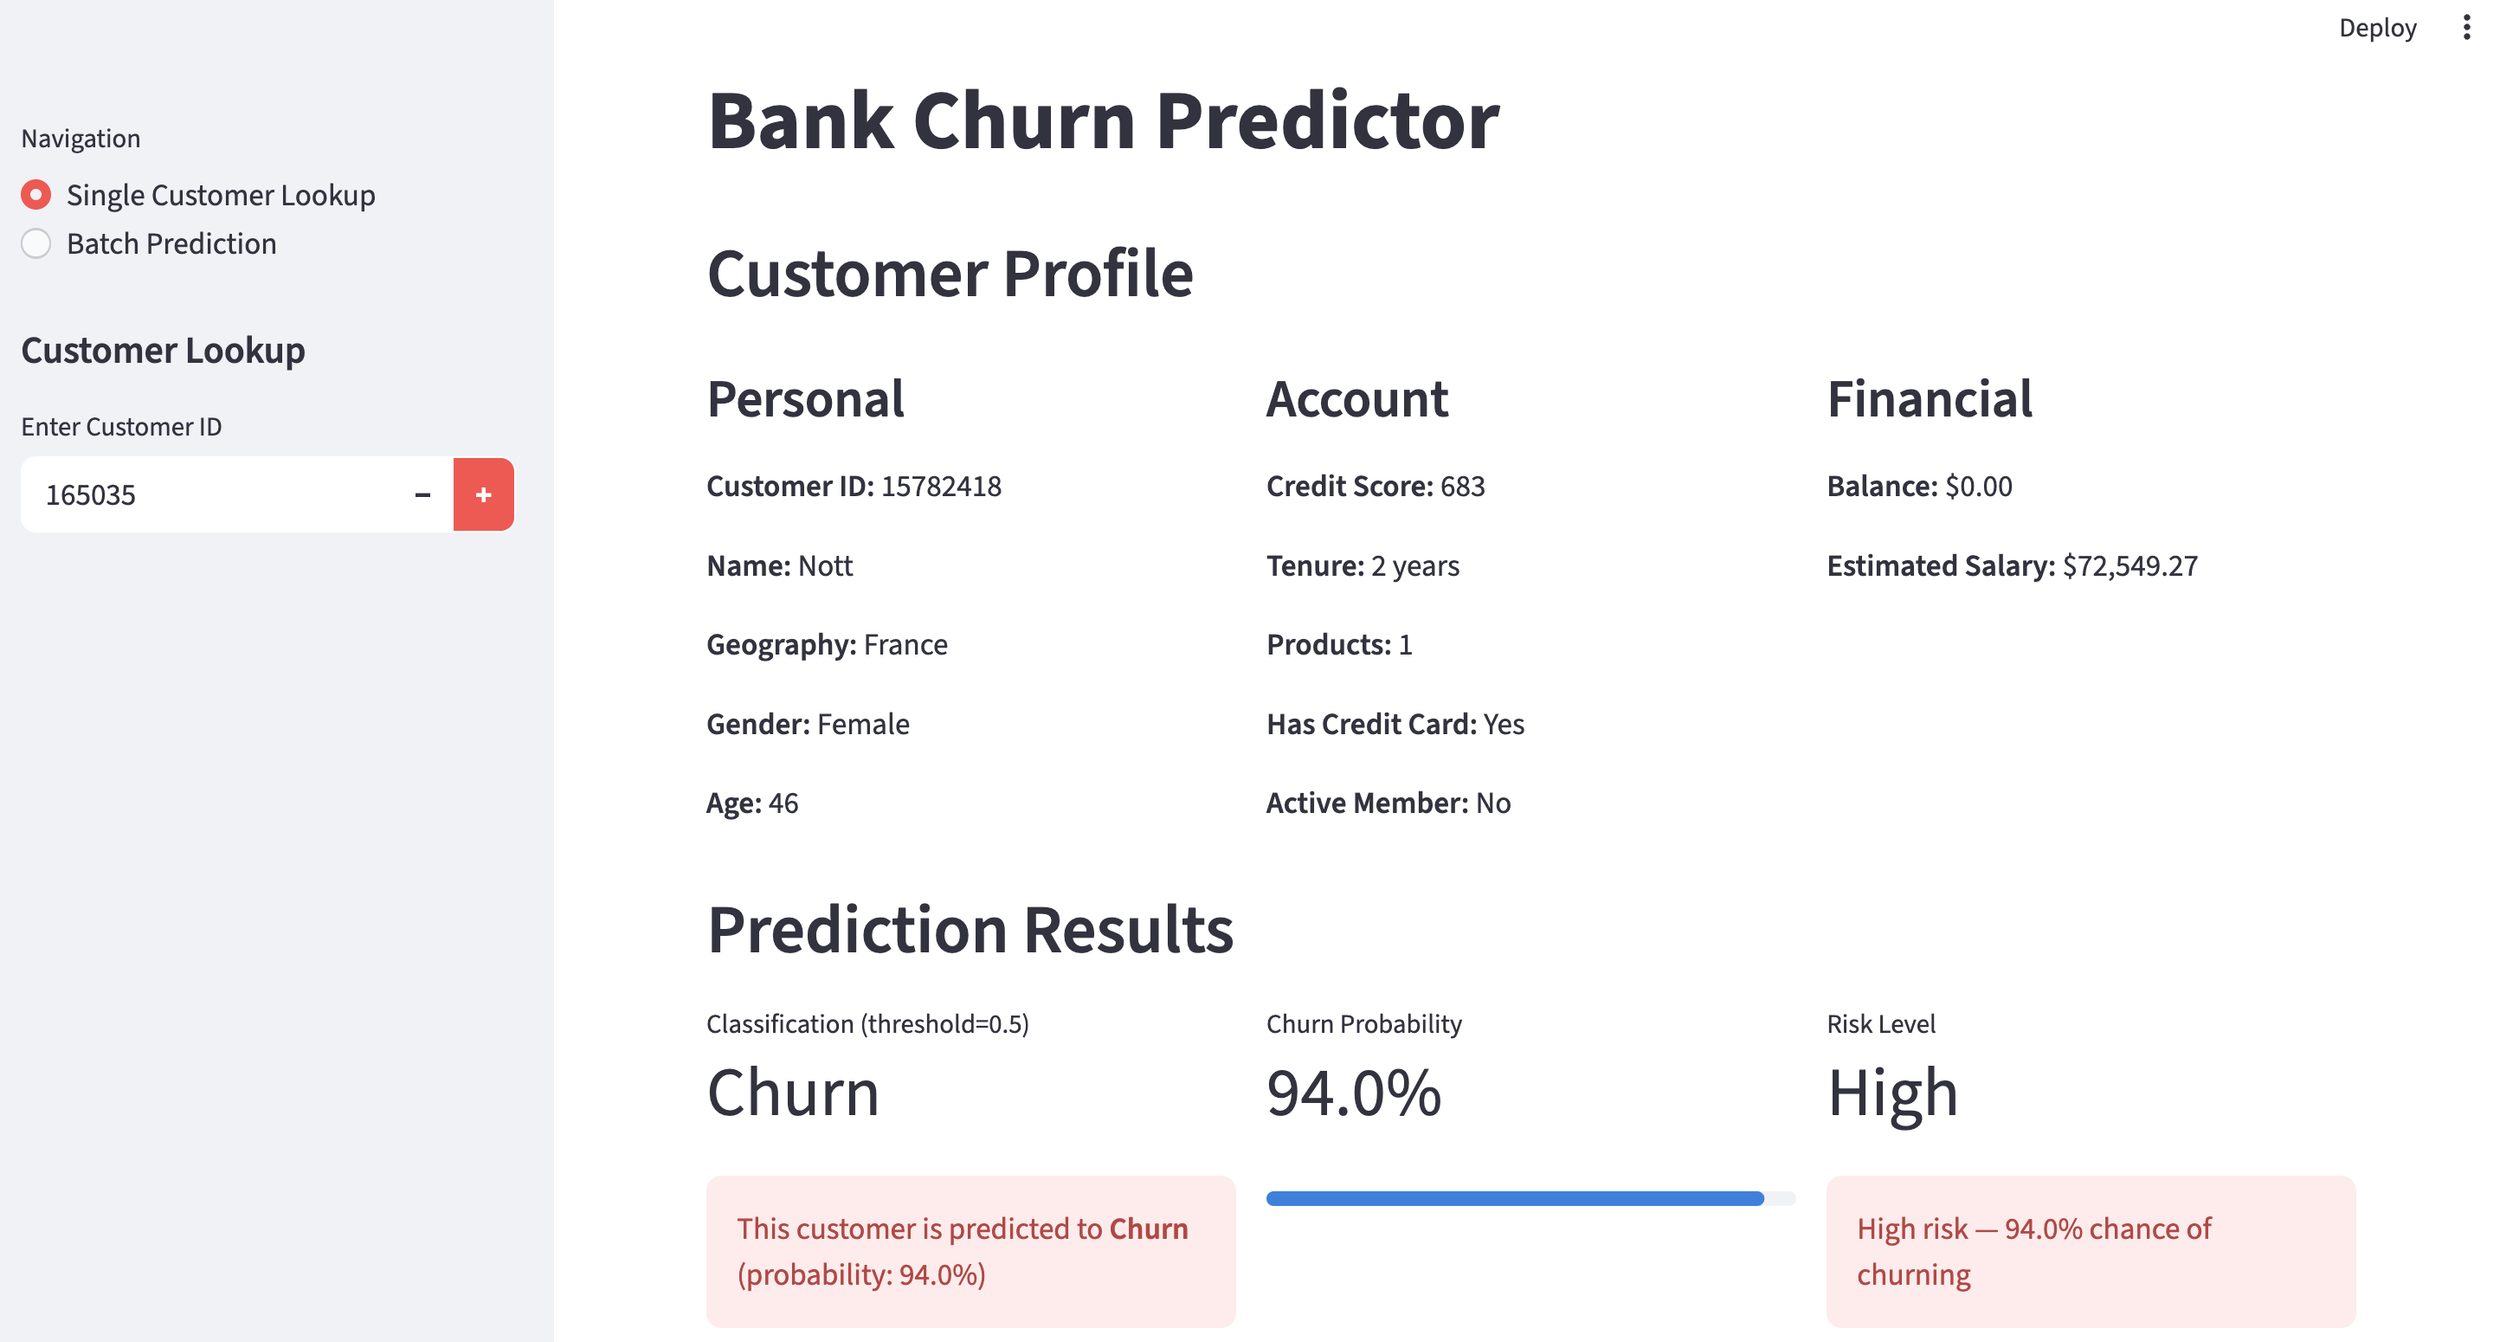
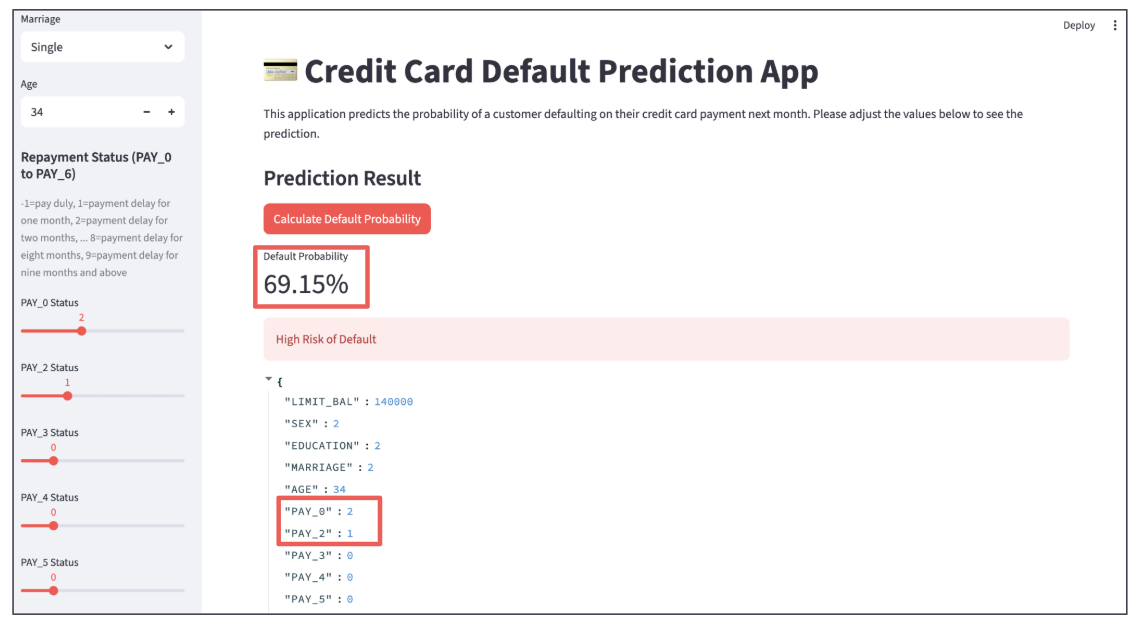
Example: Predicted Churner
Individual Prediction: Instant probability scores for specific users.
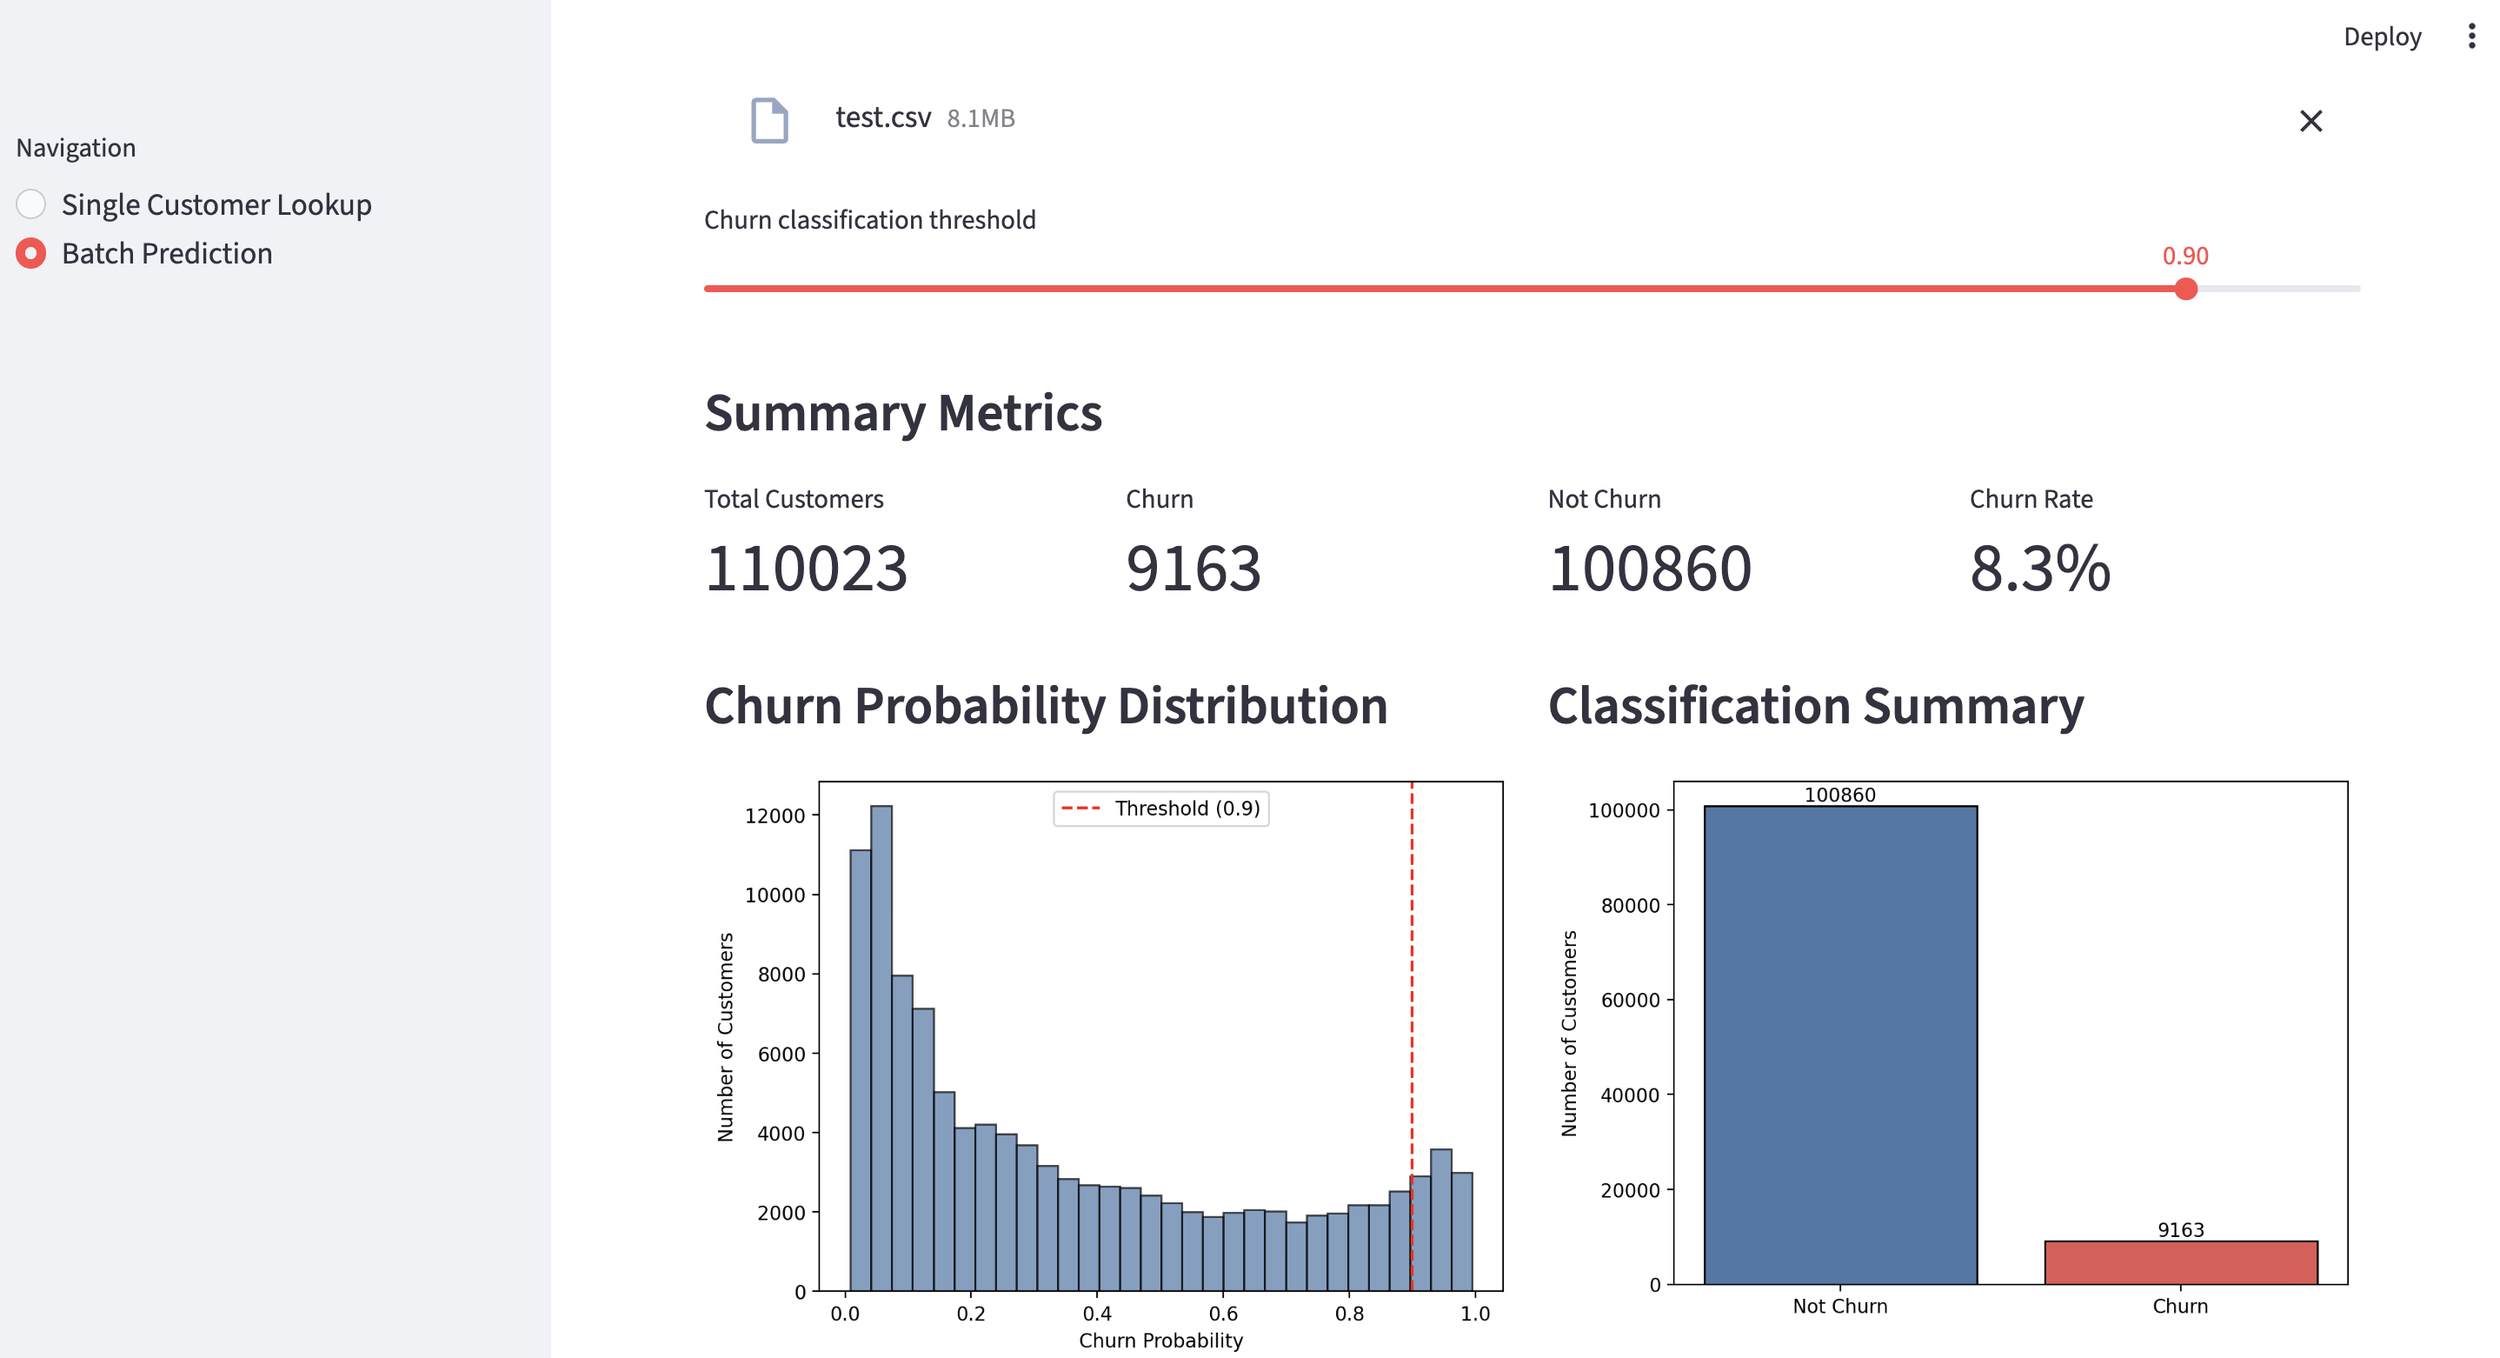
Batch Prediction: For a birds-eye view, you can upload a CSV of your entire database (approx. 110,000 customers).
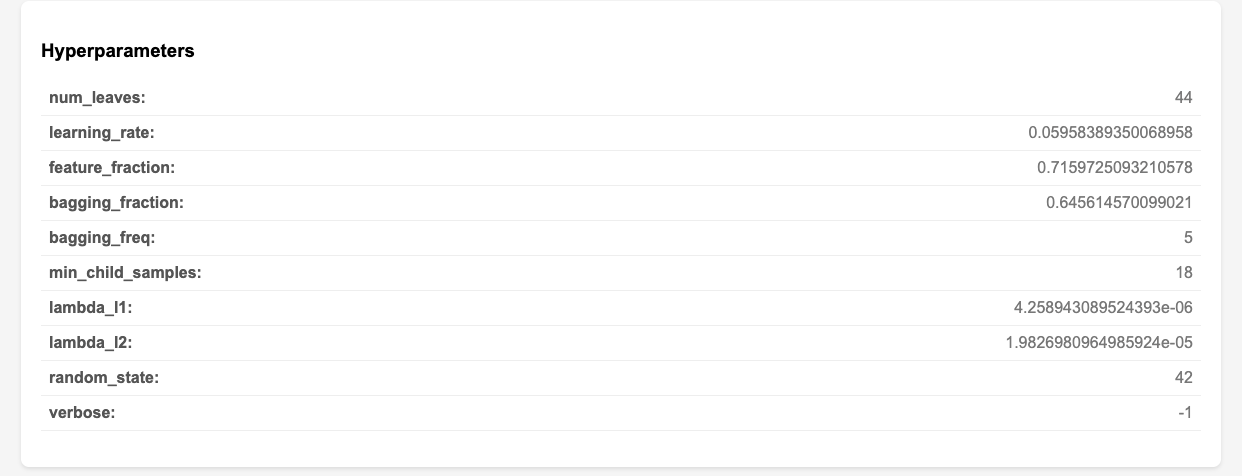
Dynamic Thresholding: You can set a churn threshold. For example, at a 50% threshold, 31.2% of the customers are flagged as likely to leave.
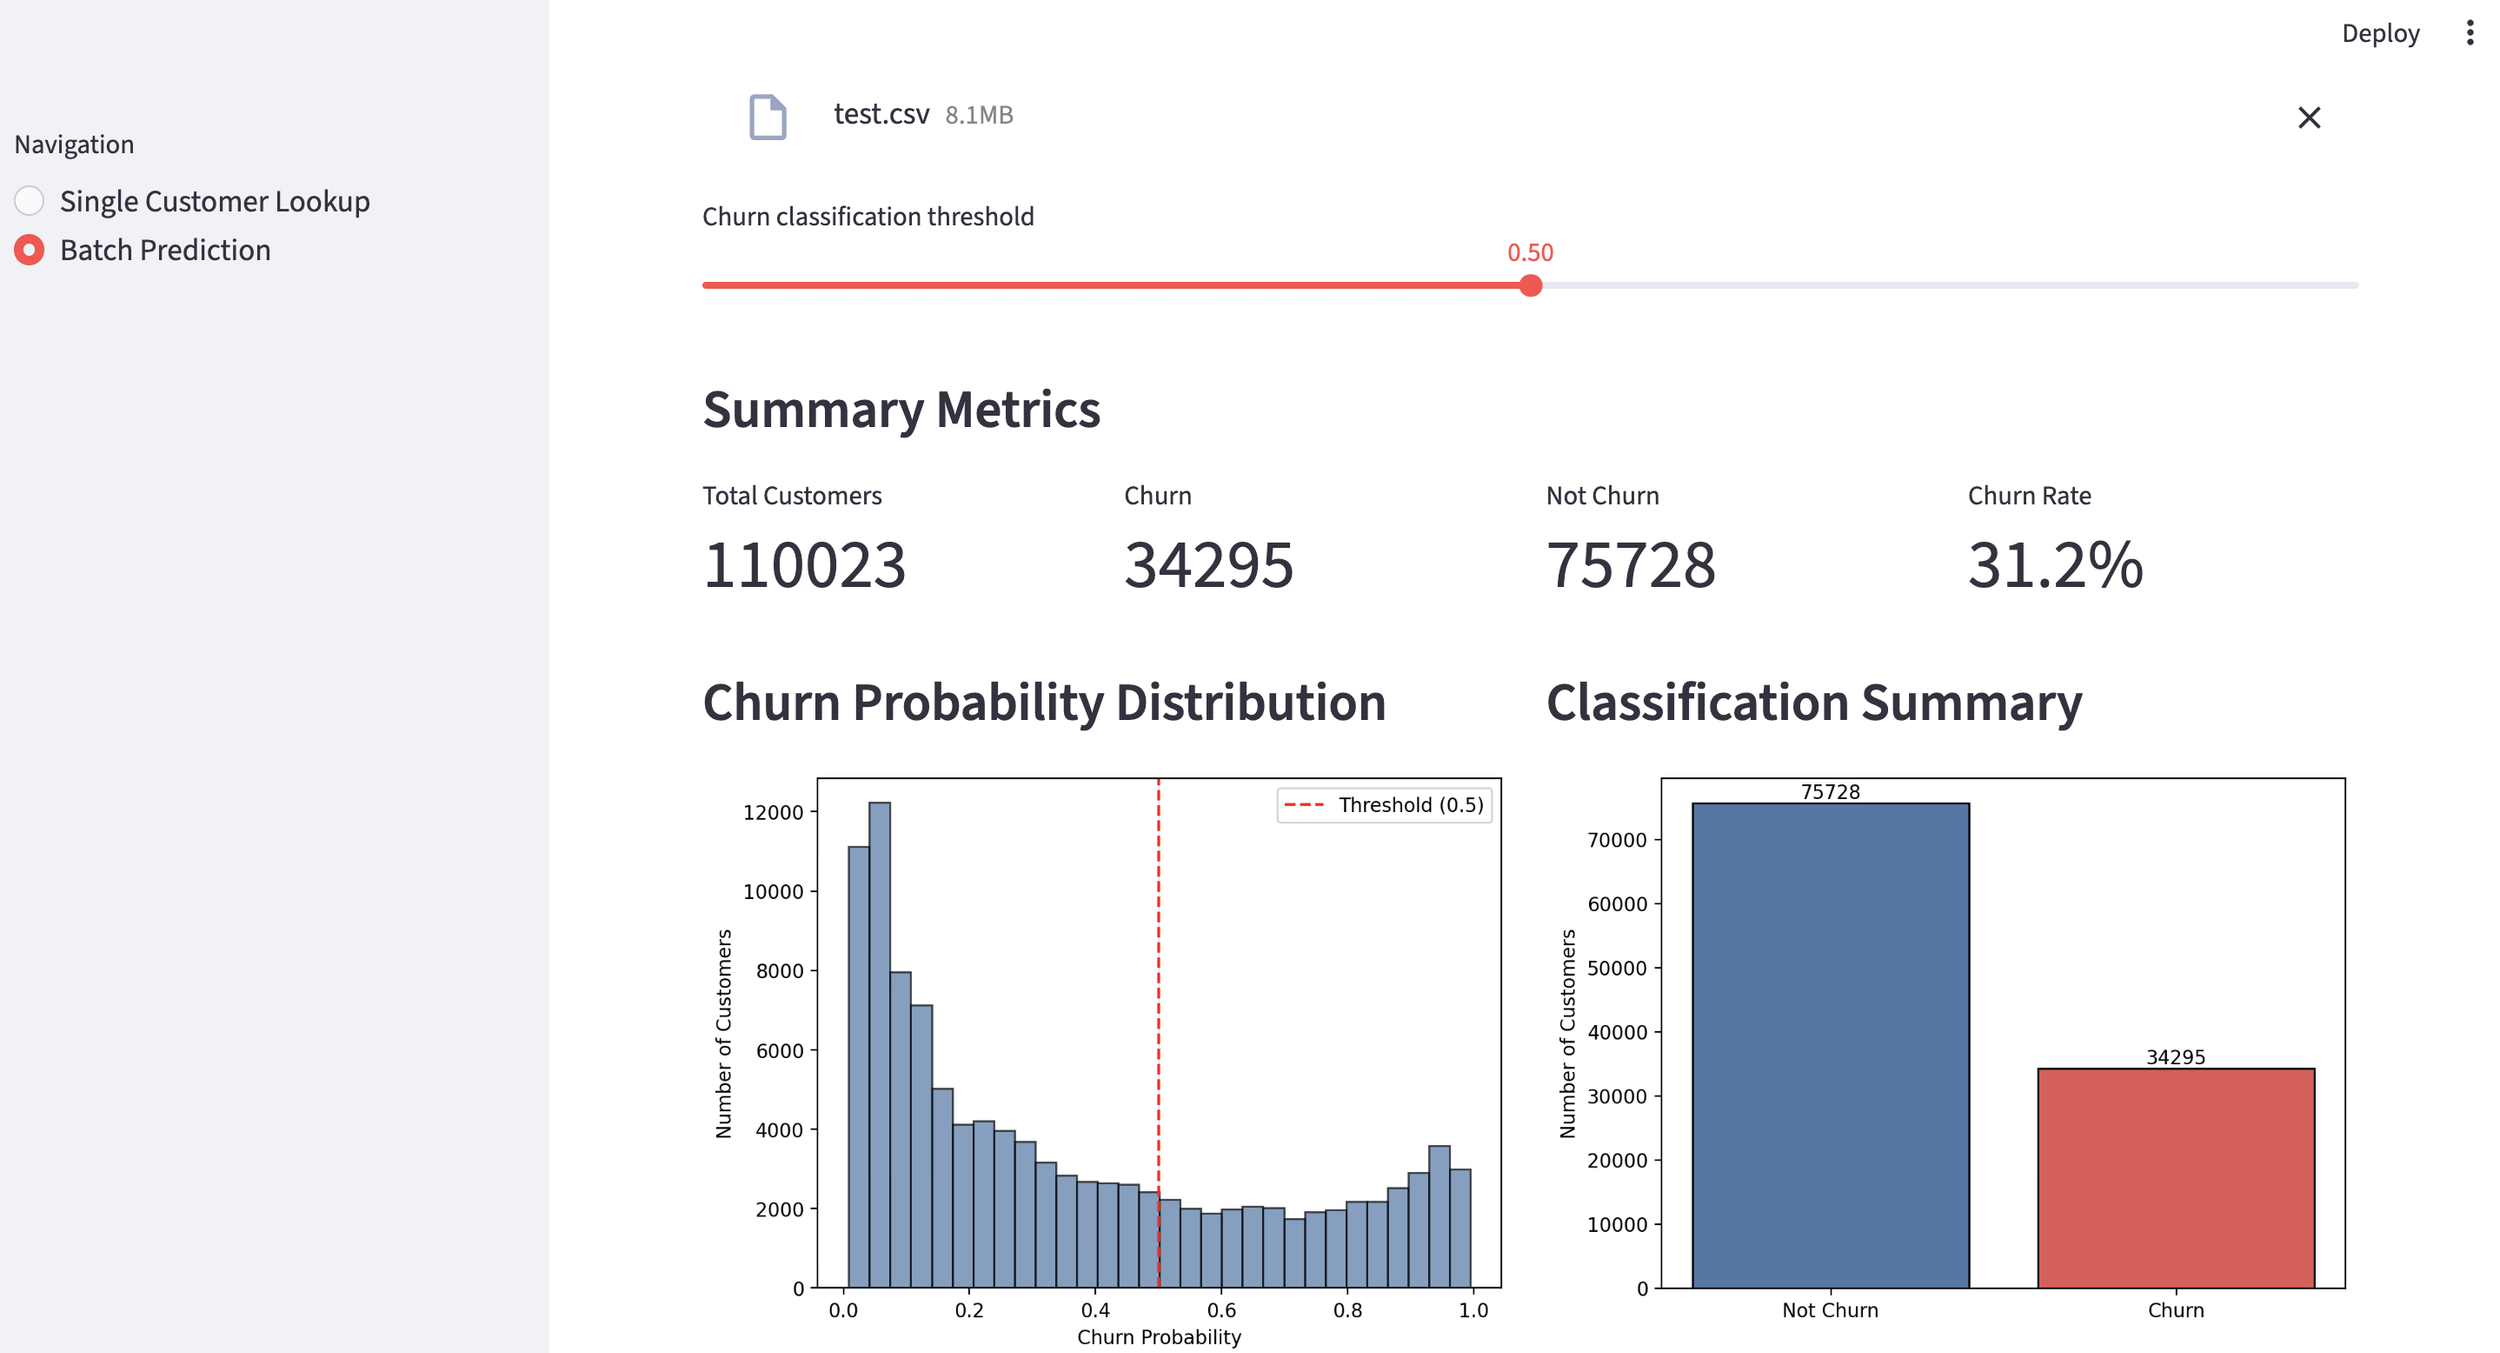
By raising the threshold to 90%, the list narrows down to the most critical 8.3% of the customer base. This makes it incredibly easy to target high-stakes marketing campaigns or retention offers.
Efficiency Note: The entire process—from data acquisition to a fully functional predictive model—took only about 90 minutes. Not having to write a single line of Python manually is a massive productivity boost.
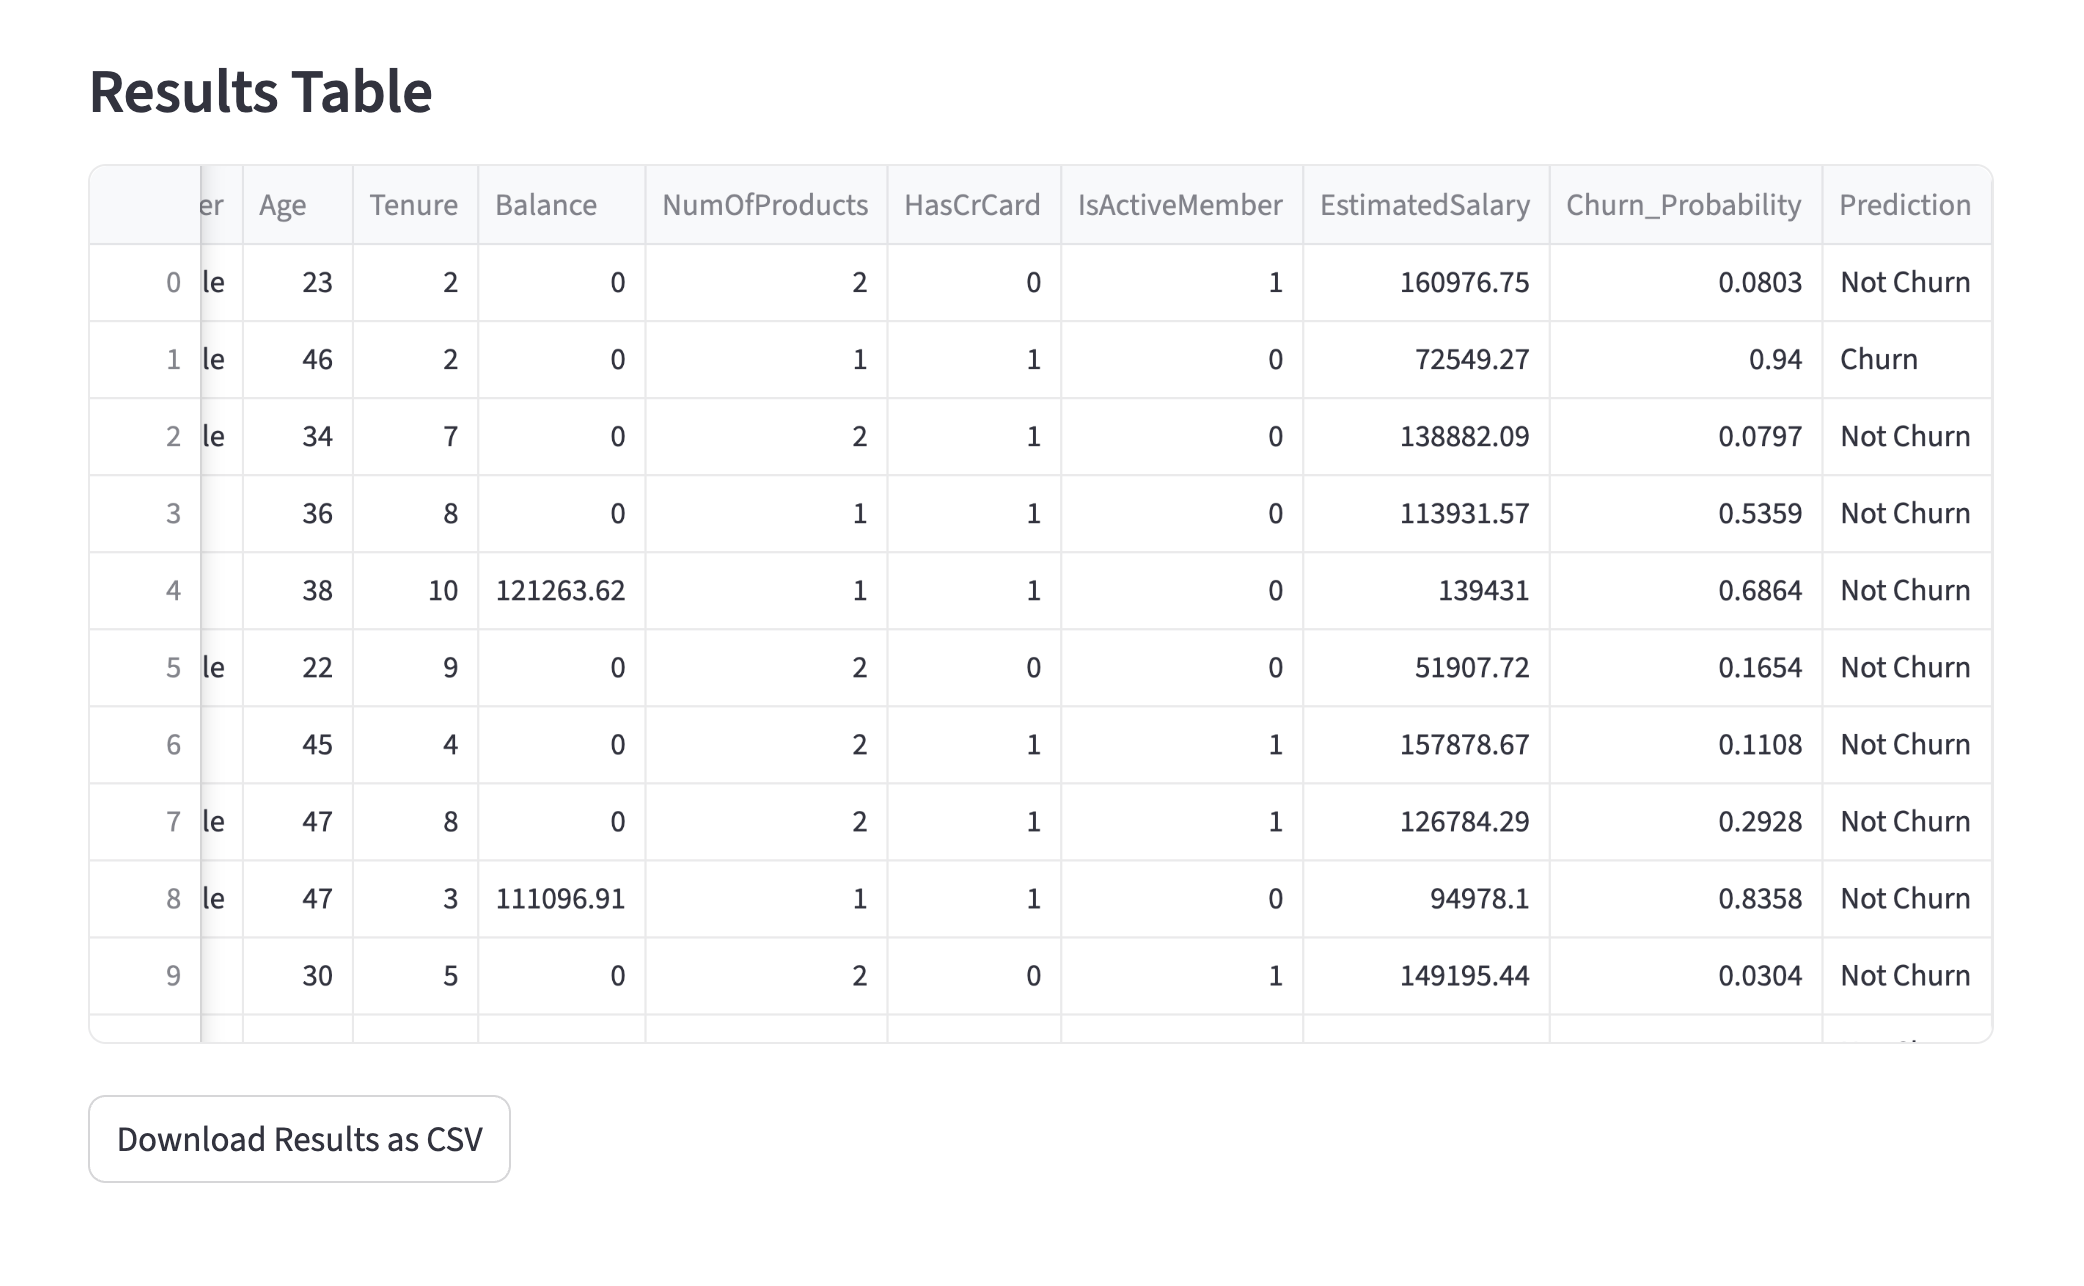
To enable even deeper analysis, I’ve also included a CSV export feature. Those proficient in Python can leverage this file to conduct their own custom evaluations as needed.
3. Glimpsing the Latent Potential of Opus 4.6
As expected, Opus 4.6 completed the end-to-end development process without a single error. When I attempted this same task with Opus 4.5, I had to tell AI agent to correct a calculation method because I hadn't been specific enough in my pipeline description. This time? Zero rework. The performance improvement is tangible.
Opus 4.6 is set to become an indispensable partner in machine learning development. While this isn't a "full" generational leap (like a version 5.0), the refinement is world-class. Rumor has it that Opus 5 is already deep in development at Anthropic and might debut in late 2026. I can’t wait to see what kind of evolution that brings.
Stay tuned!
You can enjoy our video news ToshiStats-AI from this link, too!
1) Introducing Claude Opus 4.6, Anthropic, Feb 5 2026
2) Binary Classification with a Bank Churn Dataset, Kaggle, Jan 2, 2024
Copyright © 2026 Toshifumi Kuga. All right reserved
Notice: ToshiStats Co., Ltd. and I do not accept any responsibility or liability for loss or damage occasioned to any person or property through using materials, instructions, methods, algorithms or ideas contained herein, or acting or refraining from acting as a result of such use. ToshiStats Co., Ltd. and I expressly disclaim all implied warranties, including merchantability or fitness for any particular purpose. There will be no duty on ToshiStats Co., Ltd. and me to correct any errors or defects in the codes and the software.