It is always sad when customers who have taken the time to purchase our products or services end up leaving. If possible, we want to catch the signs early and take action to prevent them from churning. However, identifying customers who are likely to churn beforehand is no easy task. That is why, this time, I tried creating a customer churn prediction model. I would like to take on the challenge of predicting and countering customer churn using machine learning and generative AI. For formulating the key churn prevention strategies, I used Gemini 3.5 Flash (1), which offers a fantastic balance of performance and cost. Let's get started.

Gemini 3.5 Flash
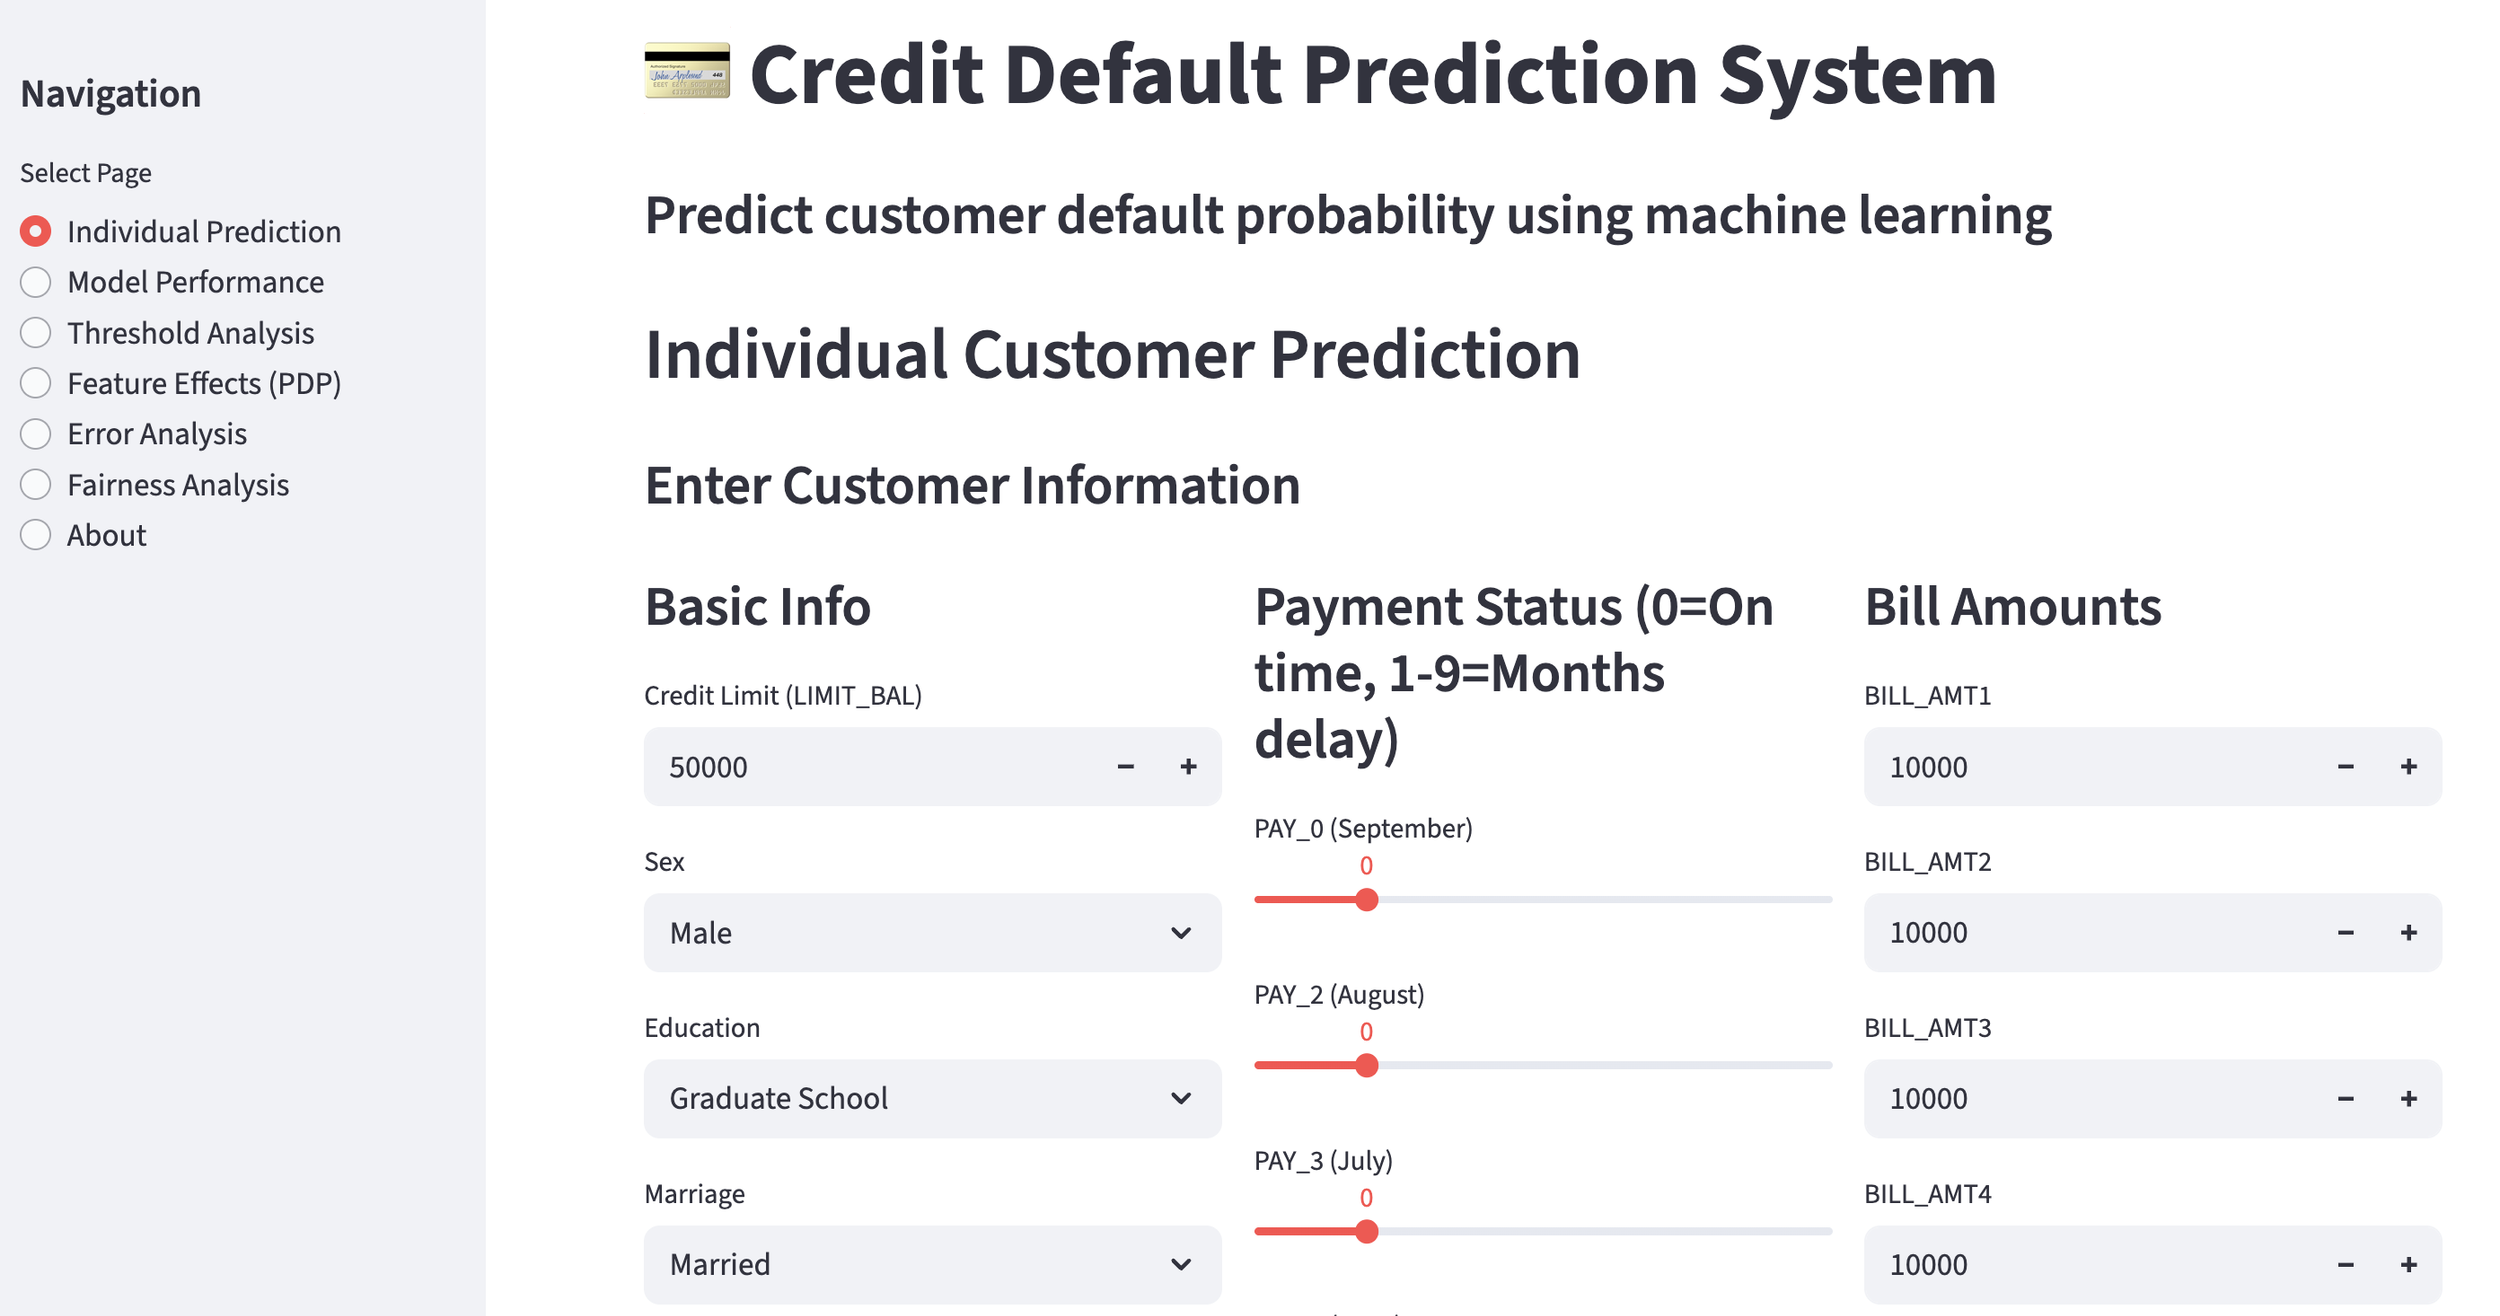
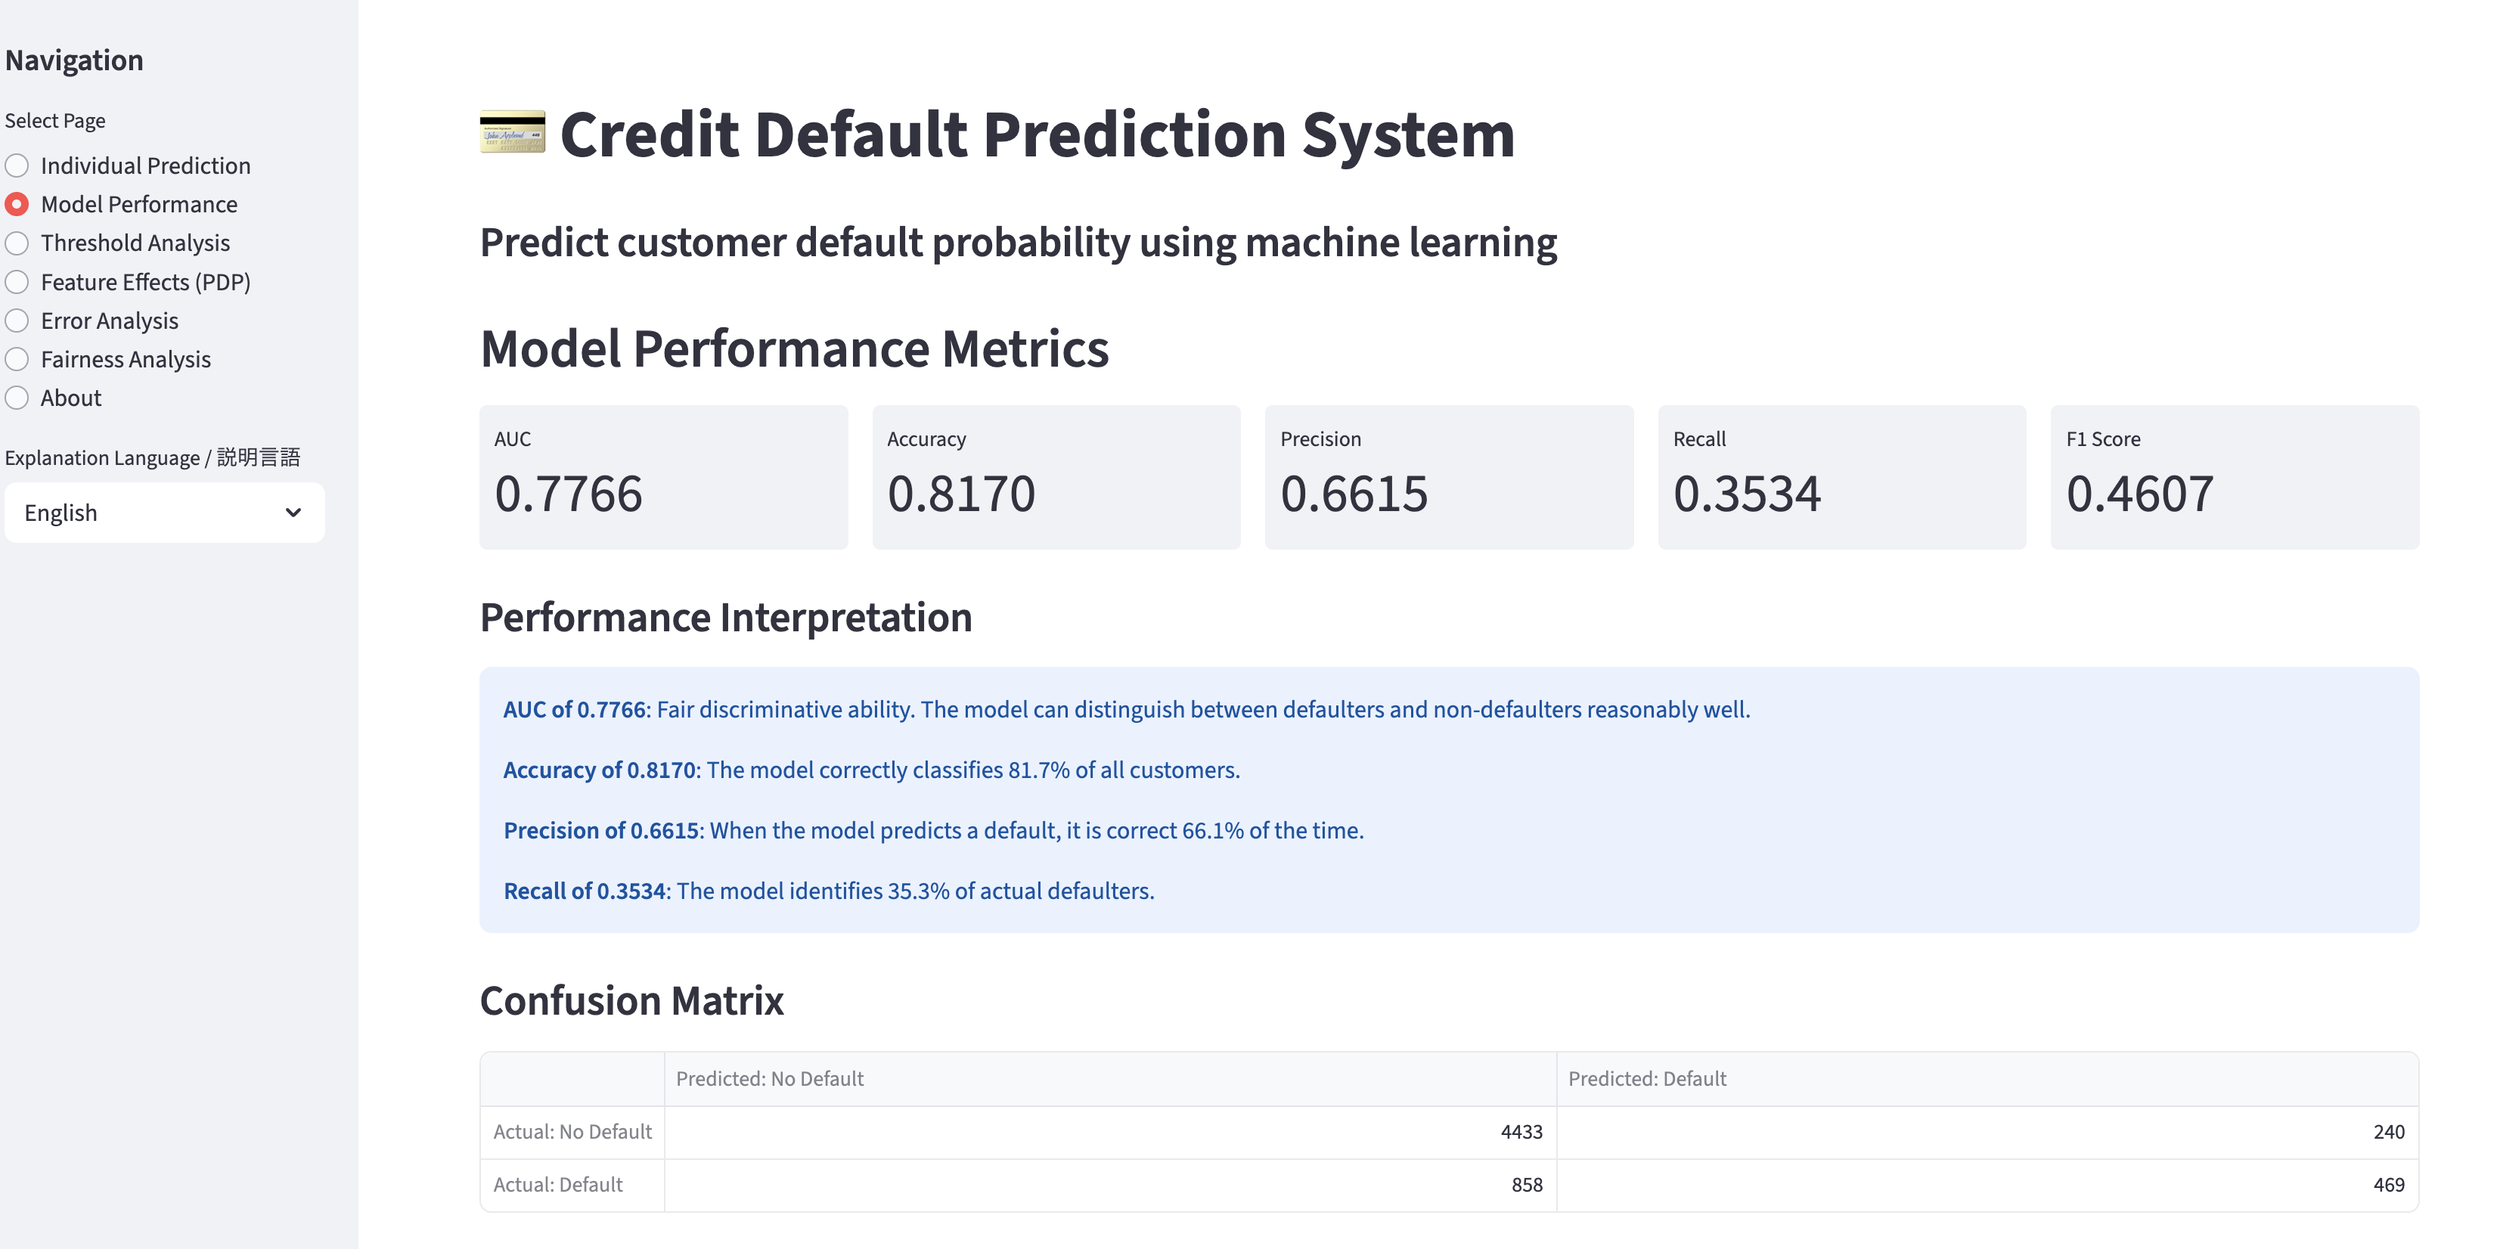
1. Customer Churn Prediction Model
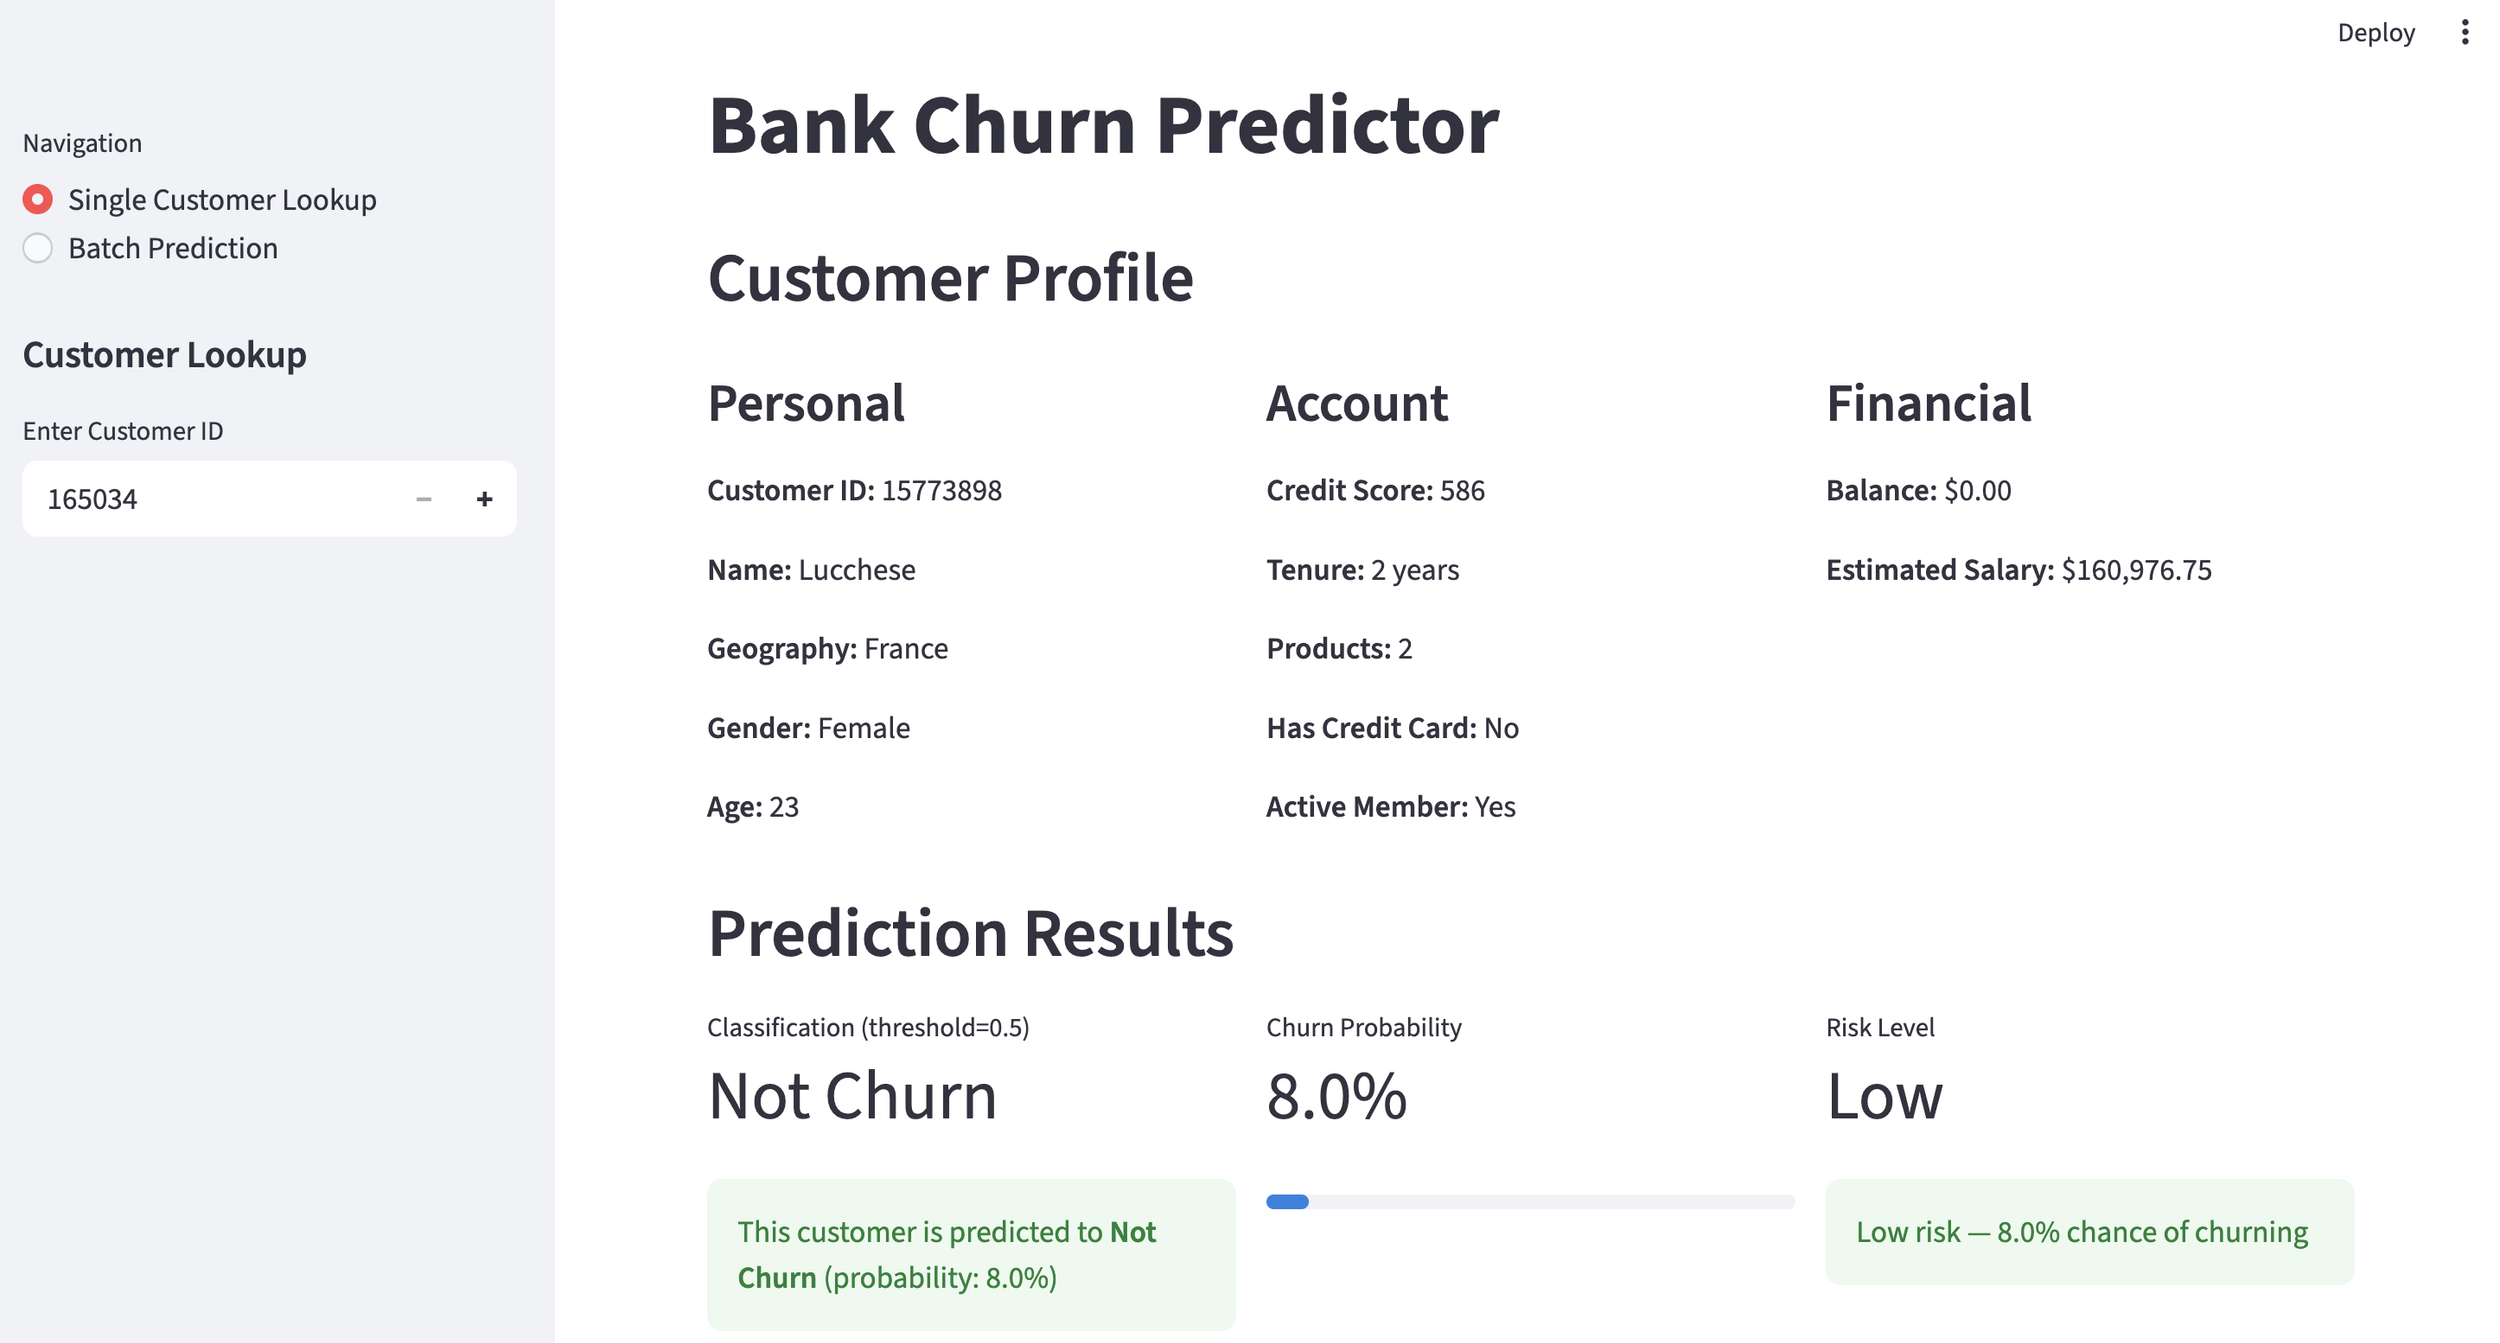
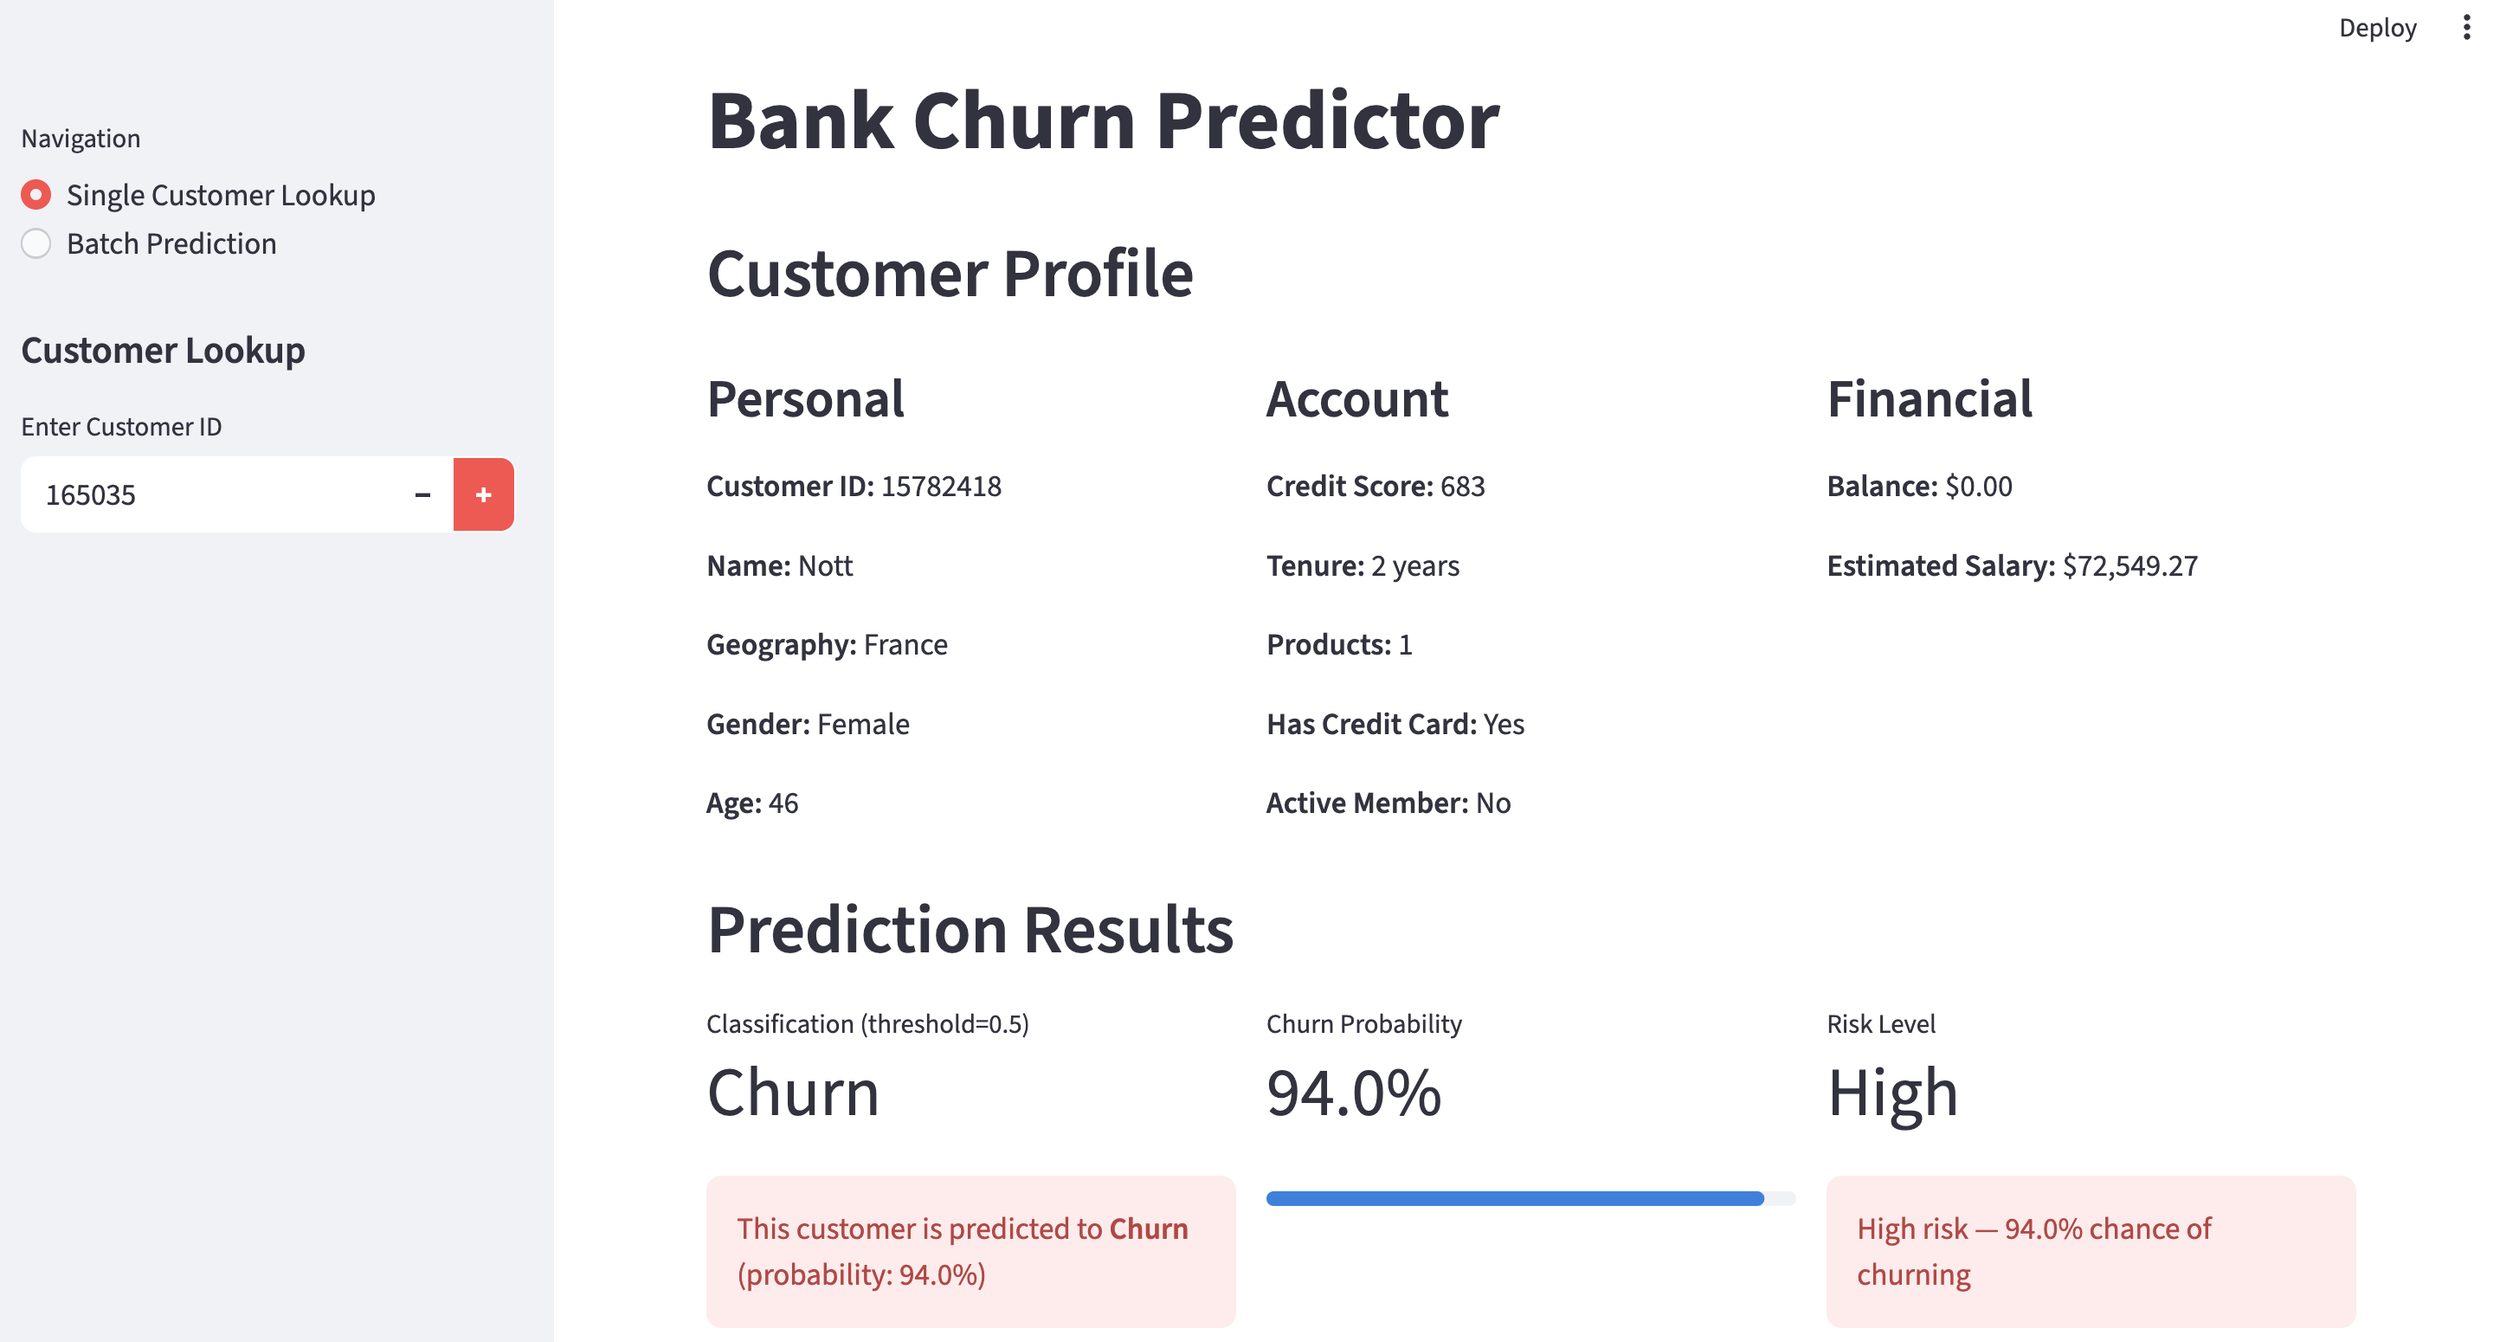
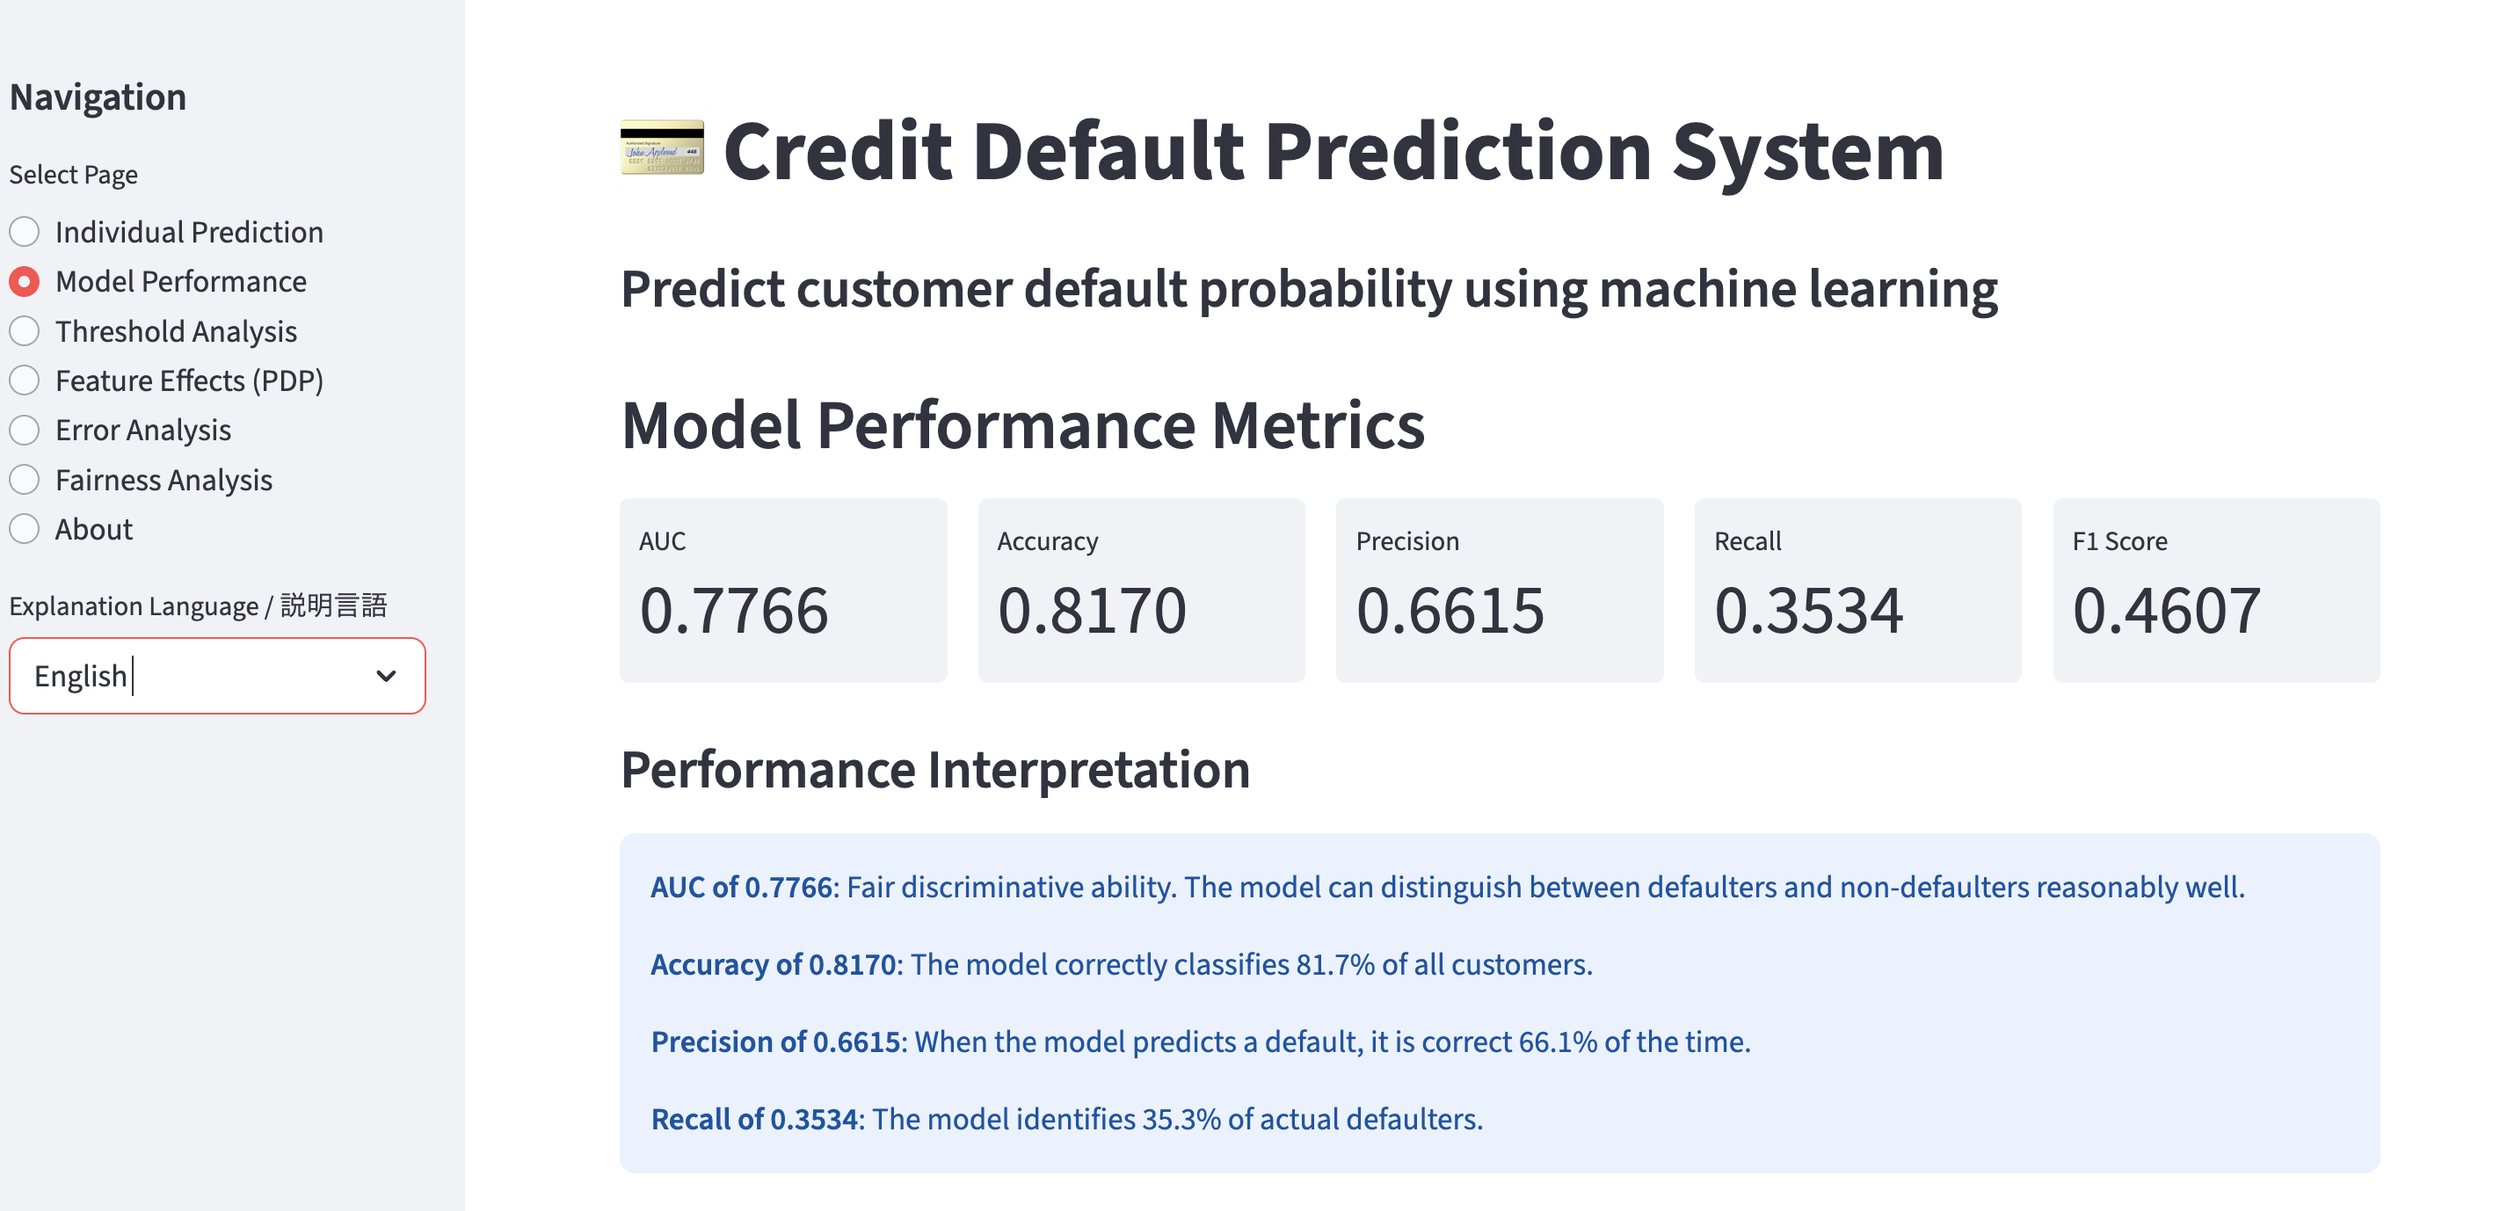
Using the created customer churn prediction model, let's first take a look at a general customer.

General Customer

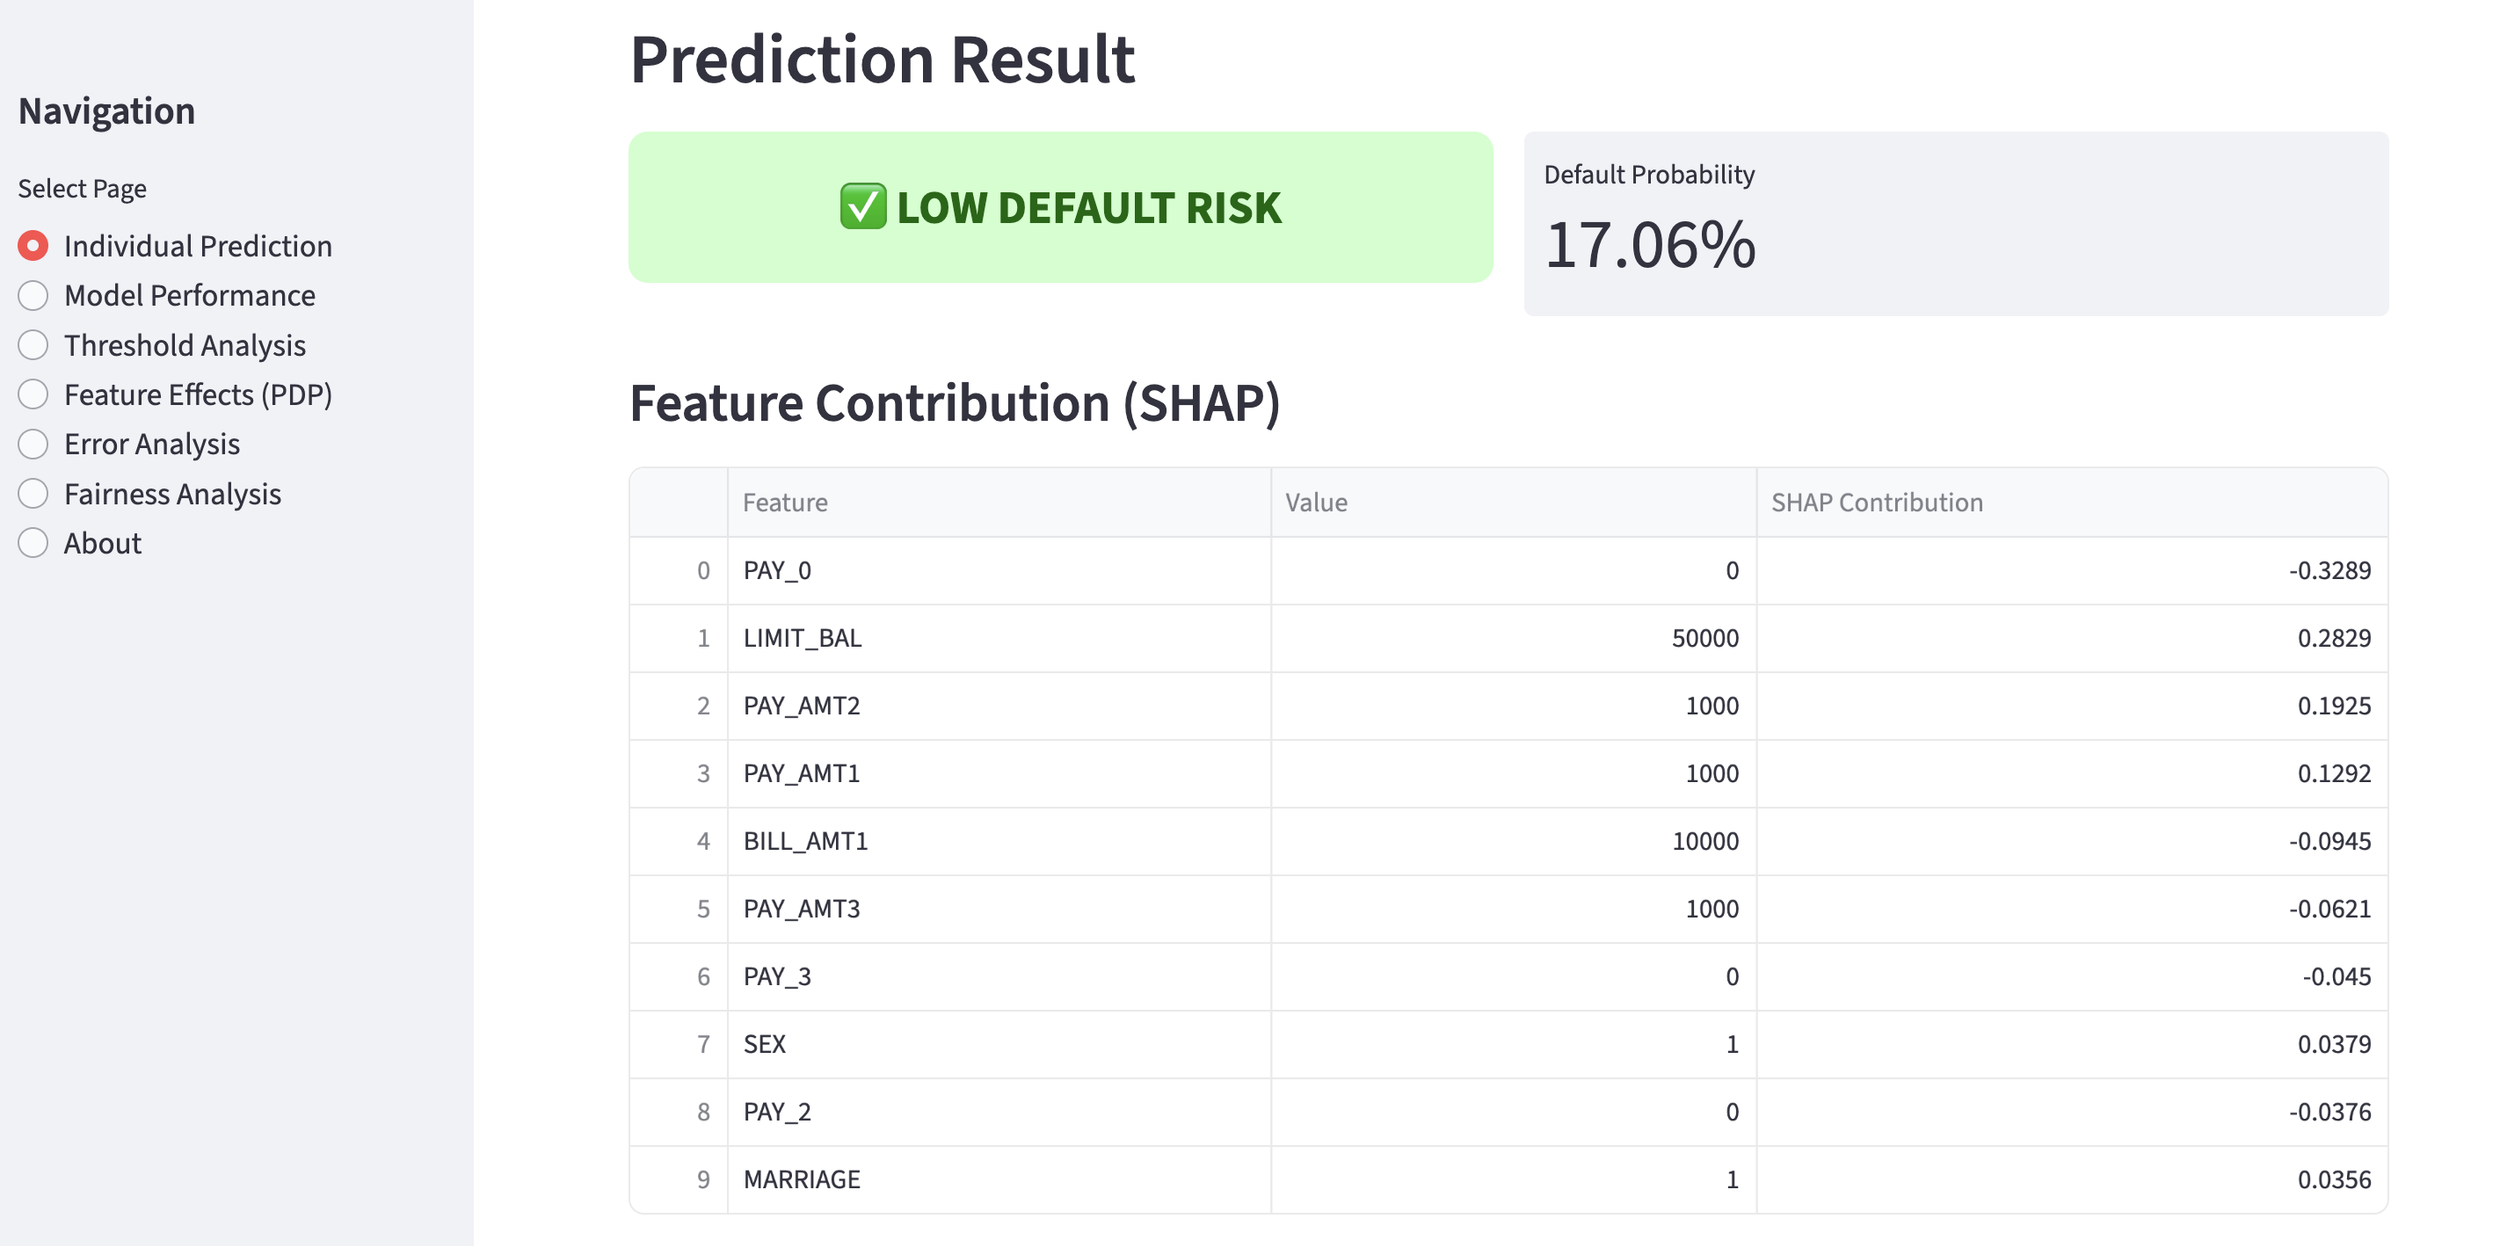
The churn probability is 15.0%, indicating a "high likelihood of continuation," so no countermeasures are needed at this time. That's a relief.

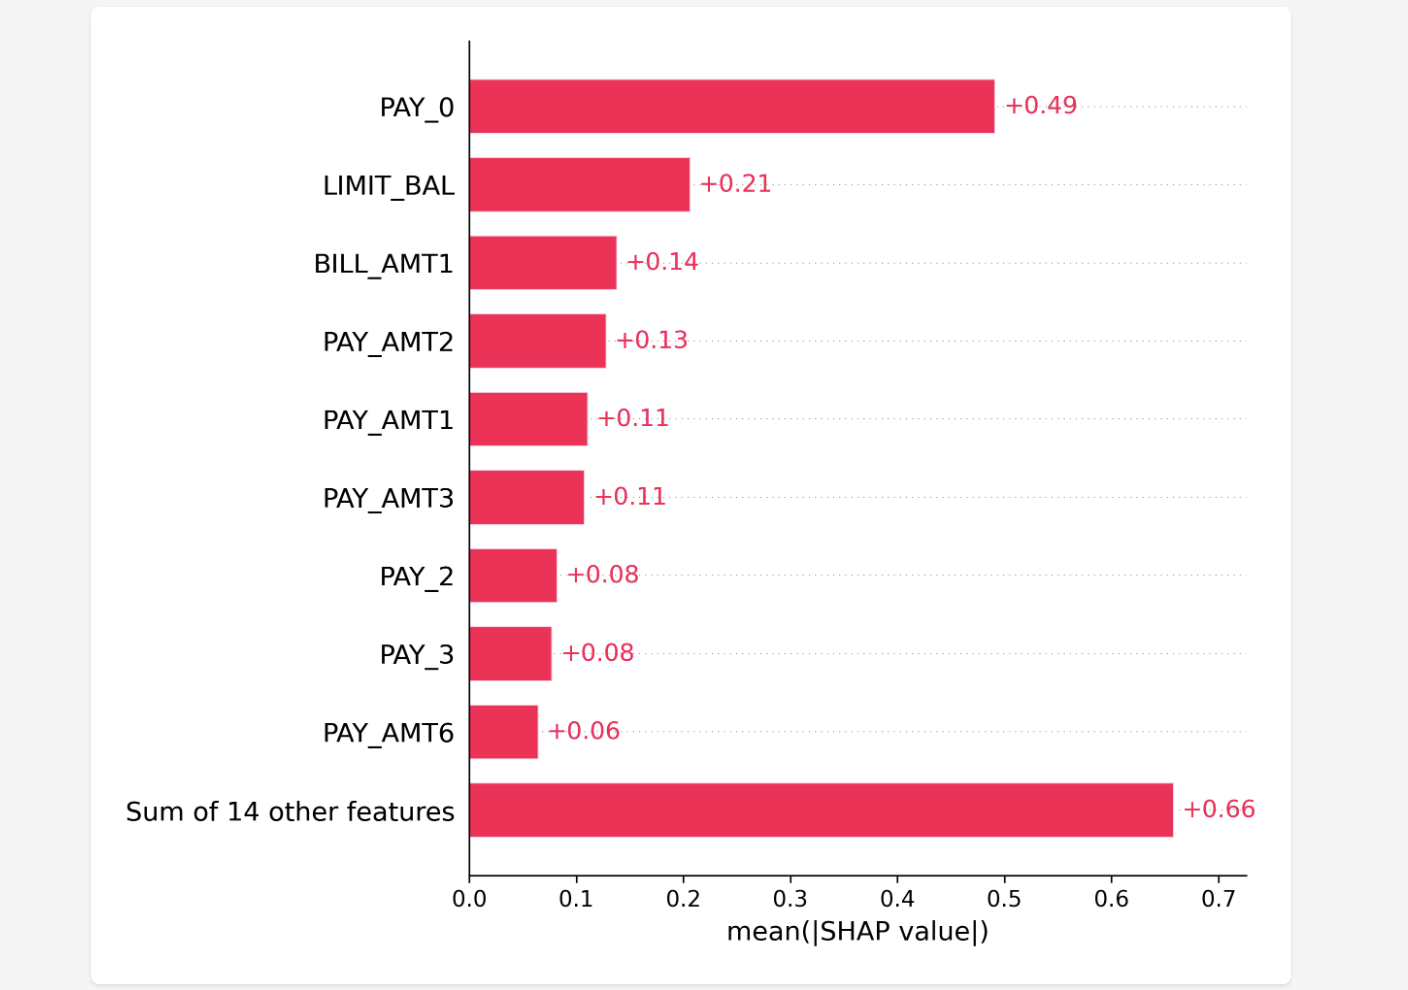
SHAP Analysis of a General Customer
At this point, some of you might be wondering, "But why did the model decide that the likelihood of continuation is high?" This is where "SHAP" (2), shown in the figure above, comes into play. Simply put, it is a "value that indicates which data influenced the model's decision and to what extent." The SHAP graph for this customer extends significantly to the left in the negative direction, indicating that the churn probability is low. SHAP values are assigned to individual customers and show why the model made its decision for each specific customer. It is very helpful for us when trying to understand the results.
2. How to Prevent Customer Churn
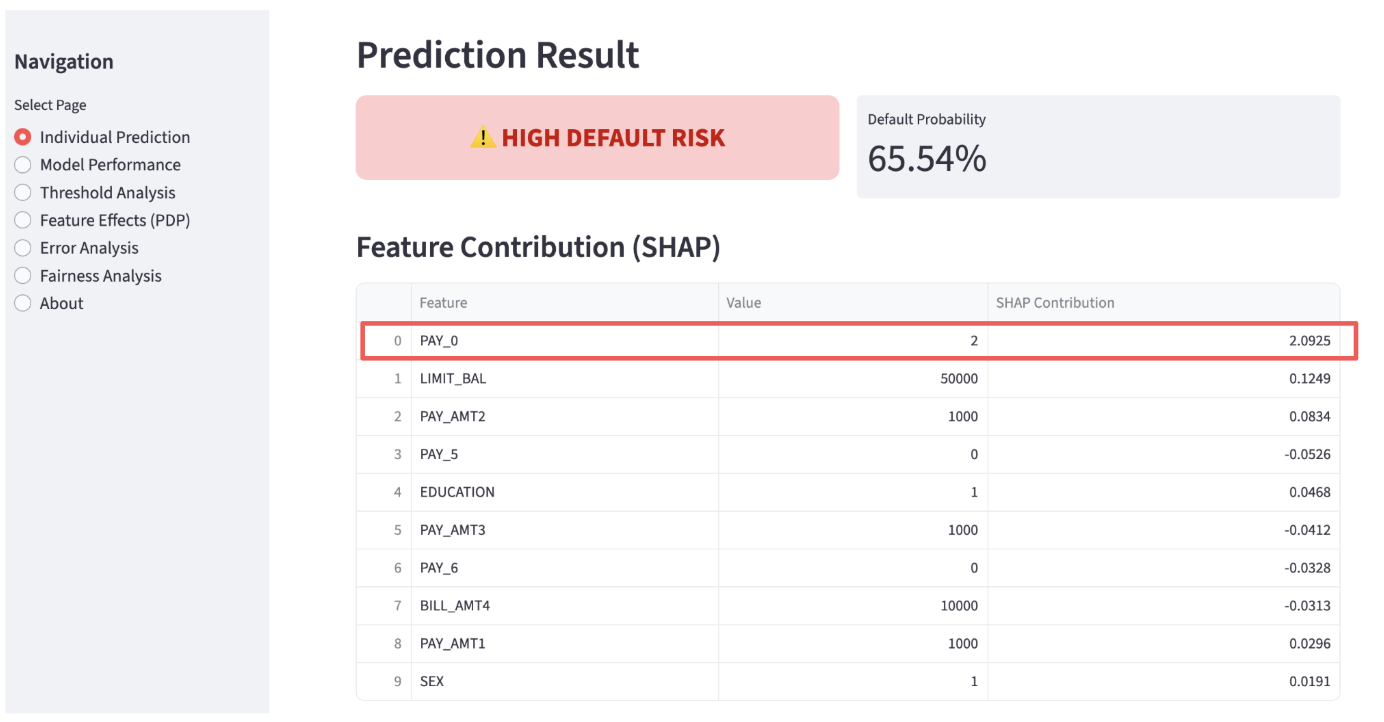
Now, let's look at a customer who is on the verge of churning. Unlike before, the churn probability is 54.5%, indicating a "high likelihood of churning," which suggests that some countermeasures are necessary.

Customer Likely to Churn

Analysis of a Customer Likely to Churn

SHAP Analysis of a Customer Likely to Churn
You can see that the SHAP graph, unlike the previous one, extends significantly to the right. In particular, tenure and MonthlyCharges are large, serving as the main factors that increased this customer's churn probability.
Also, in the explanatory text for "Individual Customer Analysis," it states:
“To retain this customer, we recommend proactive outreach with a targeted retention offer. Specifically, we can address their high monthly charges by offering a loyalty discount, or incentivize them to transition from a flexible month-to-month contract to a more stable longer-term contract.”
This is a personalized retention measure for this specific customer. It is not a generic strategy. This is because, as stated in the explanation, it was created by the generative AI, Gemini 3.5 Flash, based on the individual customer's analysis results:
“The primary factors driving up their churn risk are their tenure (SHAP: +0.2620), high monthly charges (SHAP: +0.0655), and having a month-to-month contract (SHAP: +0.0311).”
It is trustworthy precisely because it is a measure tailored to the individual customer's situation. Fantastic!
3. For Further Development
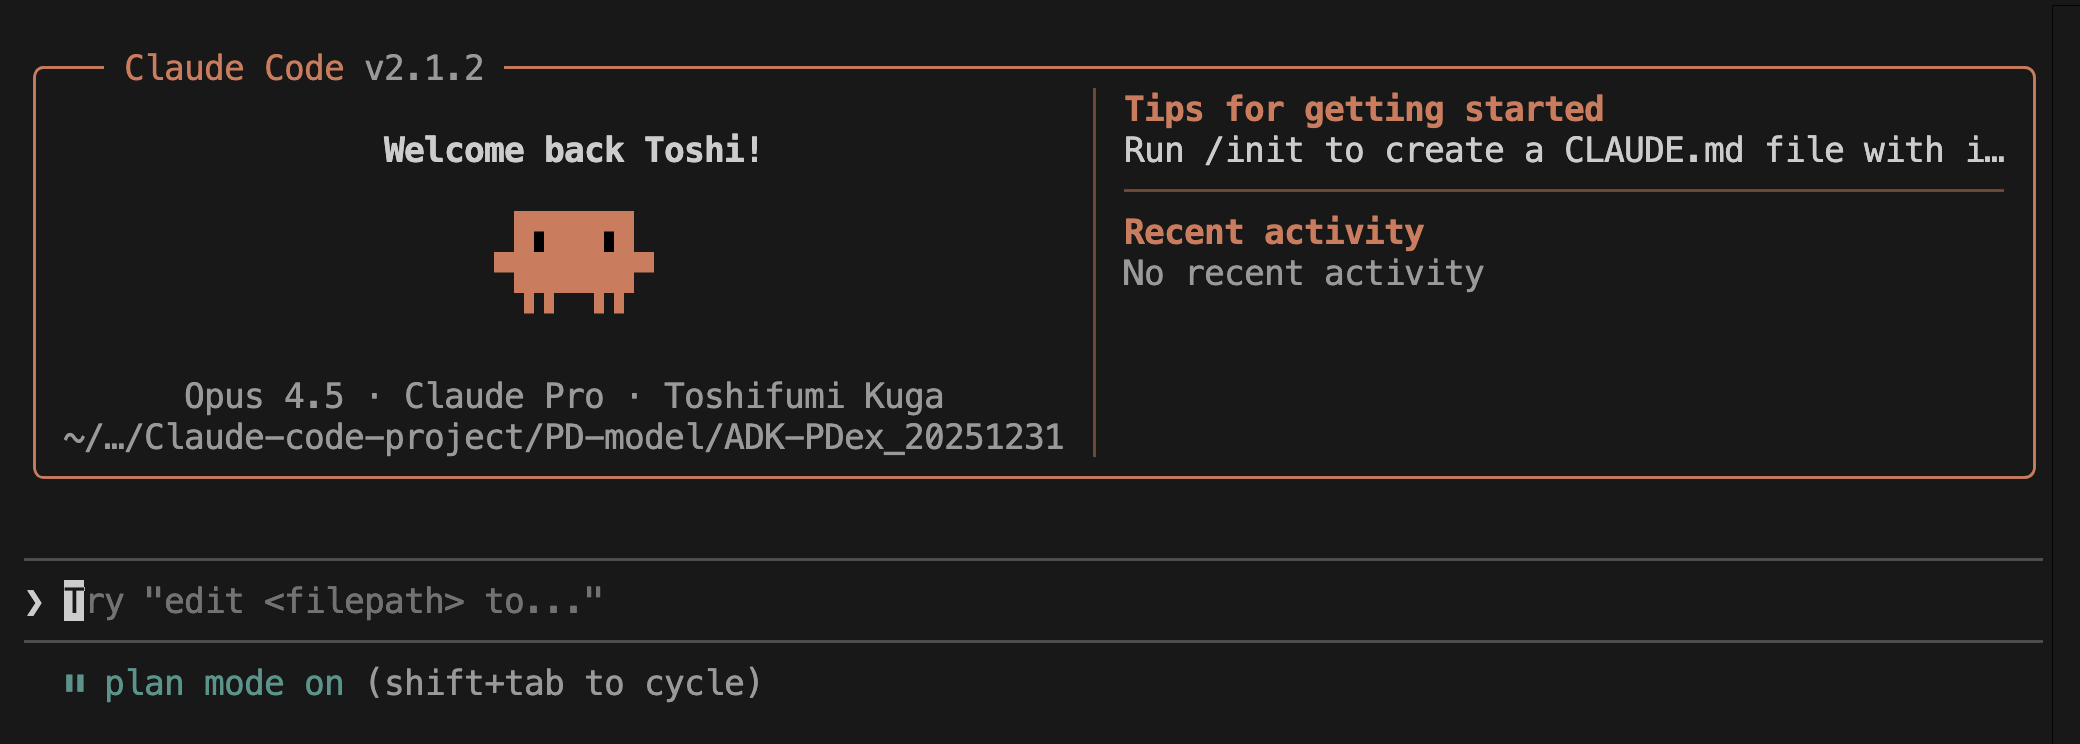
In machine learning and AI, the quantity and quality of the input data are always the key. As these increase, diverse analyses become possible, and accuracy improves. In other words, I believe it is possible to elevate this into a marketing analytics platform in the future. I am really looking forward to its future developments. As the core technologies for this product development, I used Google Gemini 3.5 Flash for natural language processing, Choice-Learn for machine learning, and Google ADK for AI agent implementation. For app development, I am using ClaudeCode. These core technologies do not need to be fixed forever; I think it is best to flexibly use or replace them as needed. Since technological advancement is fast, I plan to adopt the optimal tools available at any given time.
What did you think? I felt that with "Machine Learning + AI," we can create fantastic products where they complement each other perfectly. I'm excited about future developments. Here at Toshi Stats, we plan to continue tackling tasks in the marketing field using "Machine Learning + AI." Stay tuned!
You can enjoy our video news “ToshiStats AI Weekly Review” from this link, too!
1) Gemini 3.5 Flash Best for frontier performance across agents and coding, Google DeepMind
2) Welcome to the SHAP documentation
Copyright © 2026 ToshiStats Co., Ltd. All right reserved.
Notice: This is for educational purpose only. ToshiStats Co., Ltd. and I do not accept any responsibility or liability for loss or damage occasioned to any person or property through using materials, instructions, methods, algorithms or ideas contained herein, or acting or refraining from acting as a result of such use. ToshiStats Co., Ltd. and I expressly disclaim all implied warranties, including merchantability or fitness for any particular purpose. There will be no duty on ToshiStats Co., Ltd. and me to correct any errors or defects in the report, the codes and the software.